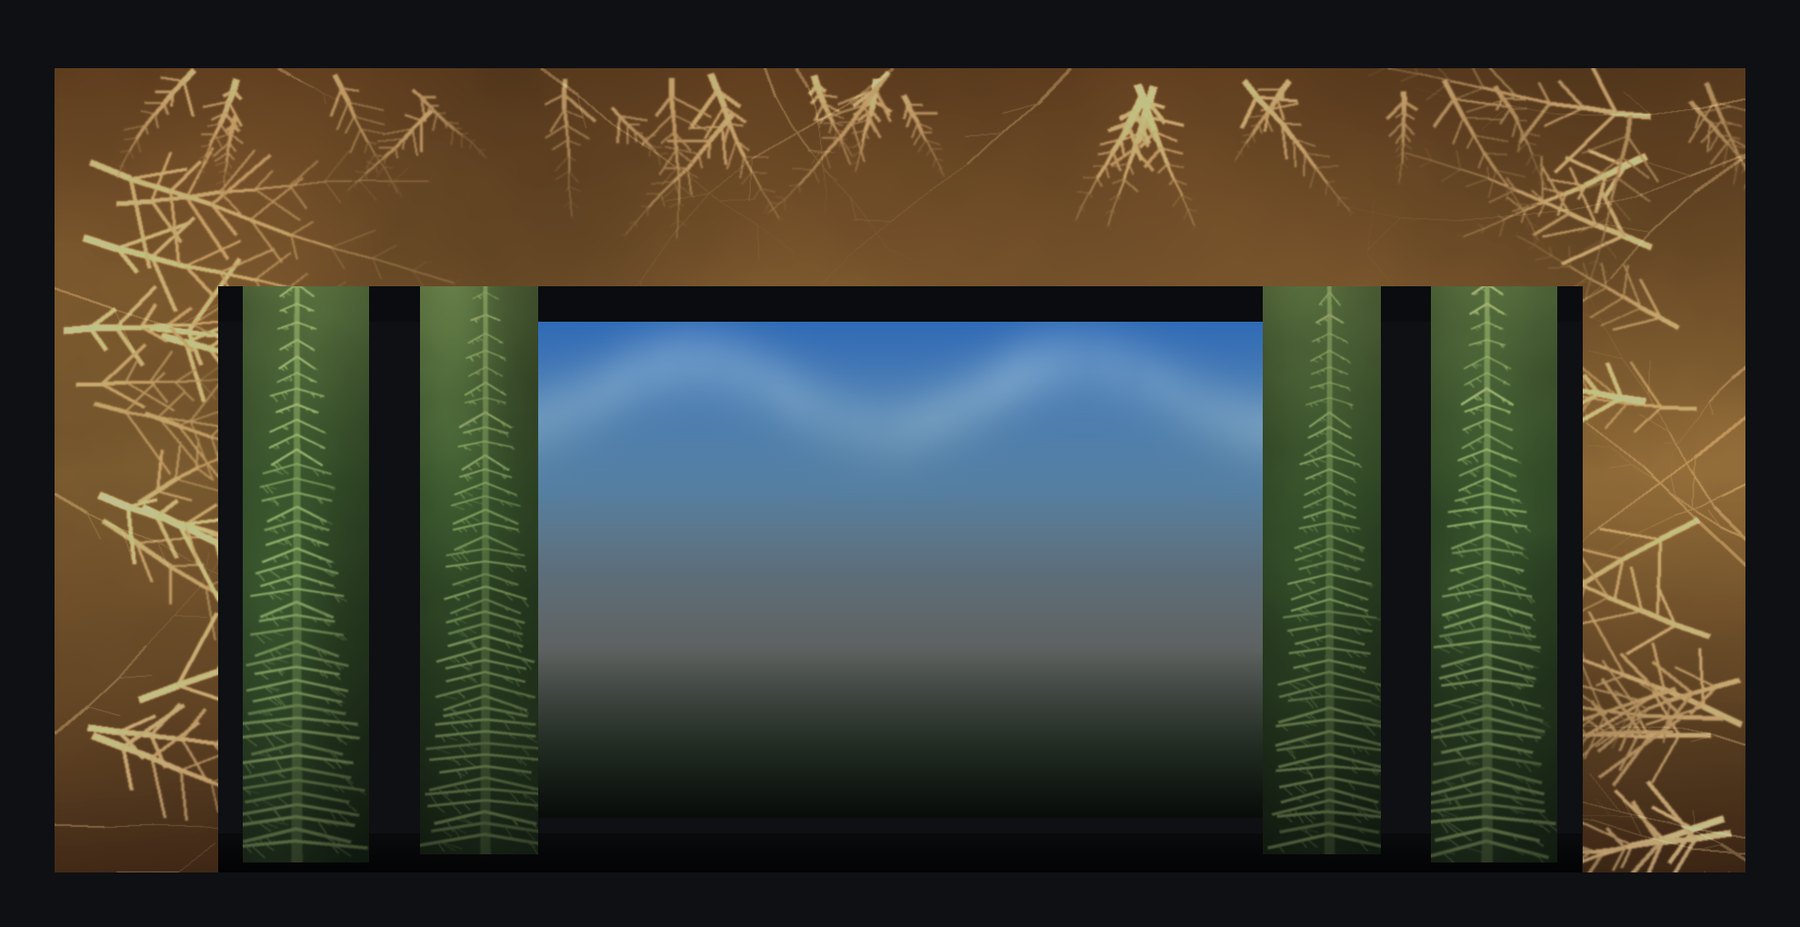
A three-surface projected set: a proscenium surround, four staggered leg
panels and a cyclorama, driven from QLab 5 by one Epson over the stage and two stacked TITANs in the
tech booth. Design, build specification, technical plot, order of process and checklists.
Venue
Corner Canyon HS
Surfaces
6 across 3 depths
Units
1 over-stage · 2 booth
Playback
QLab 5.6.3
Portal / legs
14.2 · 12.2 / 10.6 fL
Cyc
19.7 → 3.0 fL
01
The design in one idea
Arendelle is built
from three surfaces at three different depths, and the whole design follows from that.
A proscenium surround at the plaster line frames the picture and carries the emotional
temperature of the show. Four leg panels in the wings on line sets 6 and 12, staggered at 5.9′ and 11.8′
upstage, give the stage depth and a forest to walk through. A cyclorama 29.6′ upstage on line set 30 holds the sky, the ice palace, and every wide vista in the piece.
Three depths means three focus planes, three sets of geometry and three different answers
to the shadow problem. Treat them as one big screen and the show is soft on two surfaces out
of three. Treat them as three instruments and a modest rig looks like a much larger one.
The three instruments and what each plays
Surface
Size
Depth
Carries
Delivered
PORTAL
62′ × 29.5′
0′
The emotional key. Changes roughly nine times across two acts and otherwise holds.
Deep saturated ice, timber, aurora.
14.2 fL
LEGS ×4
5′ × 25′ ea.
5.9′ / 11.8′
World state and depth. Texture, never picture — bark, frost creep, ice crystal,
vertical motion only.
12.2 / 10.6 fL
CYC
50′ × 30′
29.6′
Location and scale. Every pale image in the show lives here — sky, whiteout,
ice palace, fjord. Lit area 45.1′ × 25.4′.
19.7 → 3.0 fL
The rule that makes the rig work
Pale imagery goes on the cyc. Saturated dark imagery goes on the portal and legs.
The cyc is where the pixel density and the peak brightness are; pale content is exactly what
dies at low foot-lamberts. The portal and legs carry deep frozen blues, bark and crystal, which
read beautifully at their levels and would look thin and washed if asked to hold a white sky.
Follow that split and the design looks deliberate rather than compromised.
02
The staging
Every figure below comes off the Corner Canyon house plan: a 50′×21.5′
proscenium opening, 29.6′ of usable stage depth with the cyc on
line set 30, a 75′ tech-booth throw, and a TITAN lens 10′
above the house floor — 6.5′ above a deck that stands 3′6″ proud
of it. The legs snap to existing line sets rather than inventing positions.
Front elevation as the FOH lens sees it, 9 px per foot at the portal plane. All four panels are 25′ and stand on the deck; what cuts them off at the top is the 8′ header, not a gap at the bottom. The dotted line near the foot of each panel is where the FOH ray grazes the deck — below it the beam passes under the panel and lands on the stage floor (6″ of raster on the downstage pair, 11″ on the upstage pair). Keep the bottom of your leg content dark and it never reads. The dashed box behind is the 50′ cyc cloth, which subtends only 35.9′ from this lens because it is 29.6′ upstage; the solid box inside it is what the Epson actually lights. Note where SR2 and SL2 land: they sit within 4″ of the cyc’s apparent edges, so the upstage pair frames the cyc almost exactly. That means the 1.85′ slot between each pair is mostly dark wing space rather than cyc — keep it black and it reads as depth.
Side section, horizontally compressed; heights are to scale. The Epson hangs on line set 14, 1.97′ upstage of the far leg pipe — the closest it can sit without putting the leg pipe in its own light — and throws 15.79′ to the cyc. Both leg pairs are downstage of it, so neither can shadow the cyc. Note how low the TITAN lens is: 6.5′ above the deck, roughly an actor’s eye height, which is where the shadow problem on the legs comes from. The FOH cone passes the portal plane and continues onto the legs — same projectors, different regions, different warps.
Leg positions
The legs live where curtain legs live, staggered in the traditional masking order:
LEG-*1 on line set 6, downstage and furthest offstage, LEG-*2 on line set 12,
upstage of it and stepped onstage. Their offstage and onstage edges are set so the pair reads as one
receding wall with a deliberate slot of cyc between them.
Alignment must be worked in apparent position, not physical. A leg at
11.8′ upstage is foreshortened to 86% of its true offset from centre; one at 5.9′ to
93%. Lay these out with a tape measure on the deck and they will be nearly two feet out to the
eye.
Leg positions — feet from centre line, stage right; stage left mirrors
Leg
Depth
Physical span
Apparent span
Lit
Level
LEG-SR1
5.9 ft line set 6
−26.00 to −21.00
−24.10 to −19.47
100% full
12.2 fL
LEG-SR2
11.8 ft line set 12
−20.39 to −15.39
−17.61 to −13.29
100% full
10.6 fL
Both walls are fully lit from every seat, with 2.15 ft of shadow margin between
the panels and 11.7 in of margin against the proscenium edge. Section 12 explains why those two
numbers matter more than they look.
03
Look development
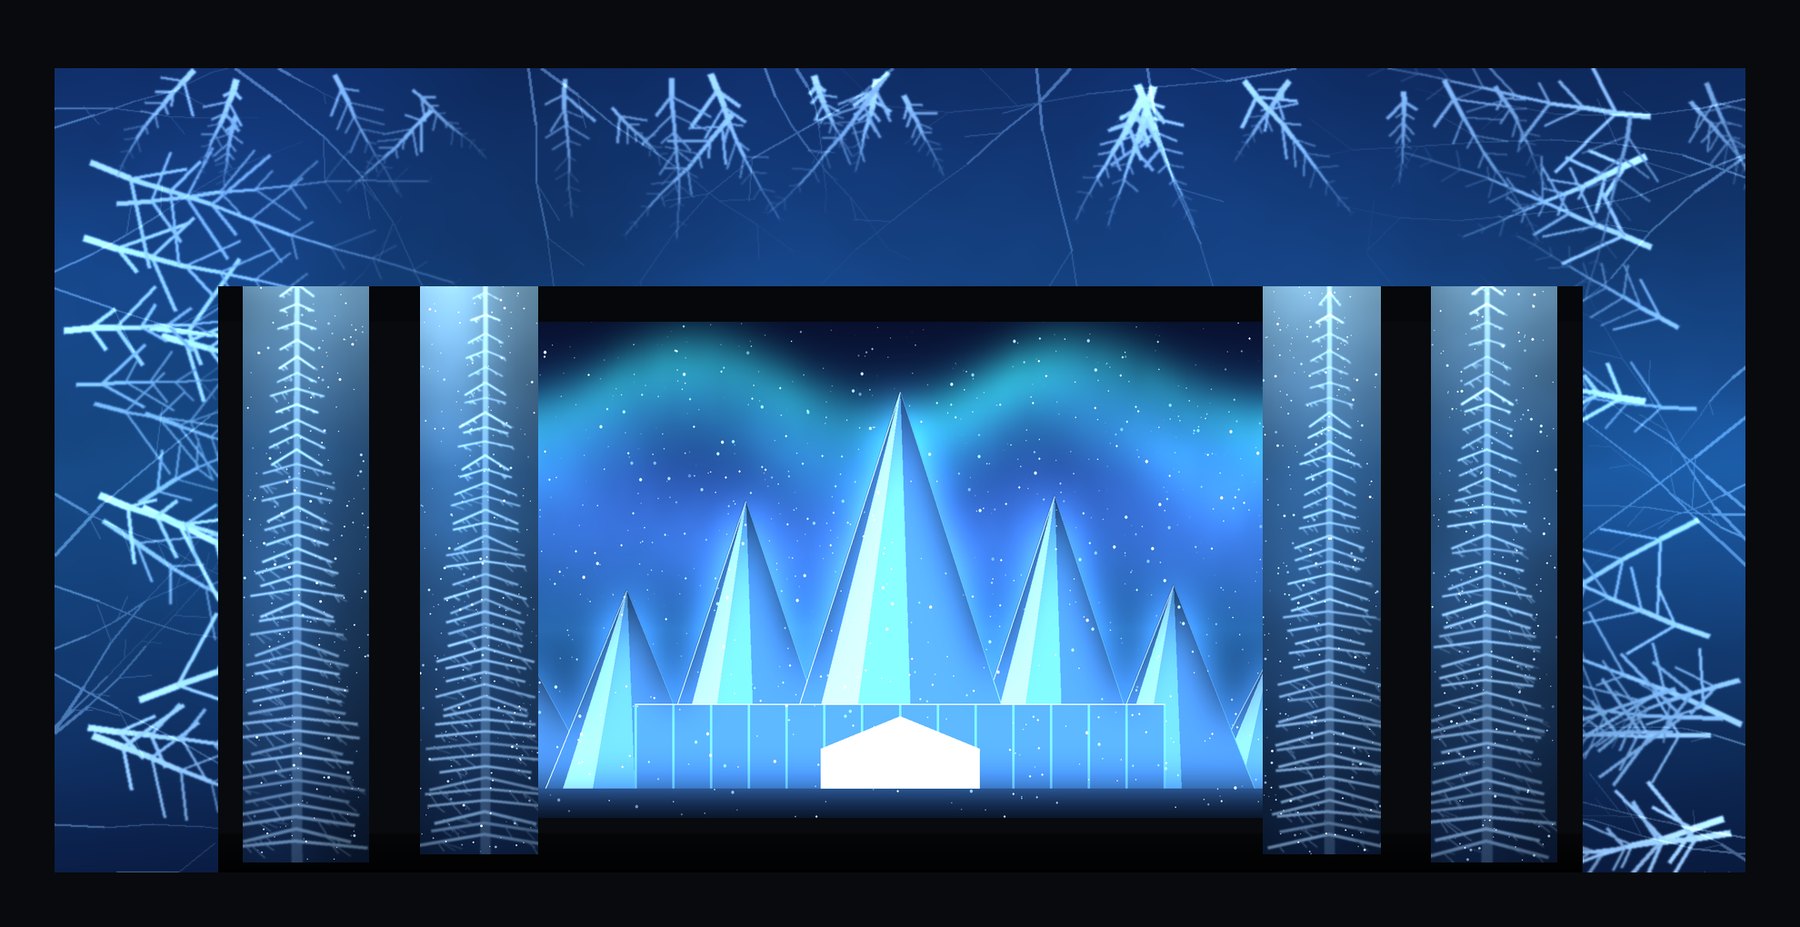
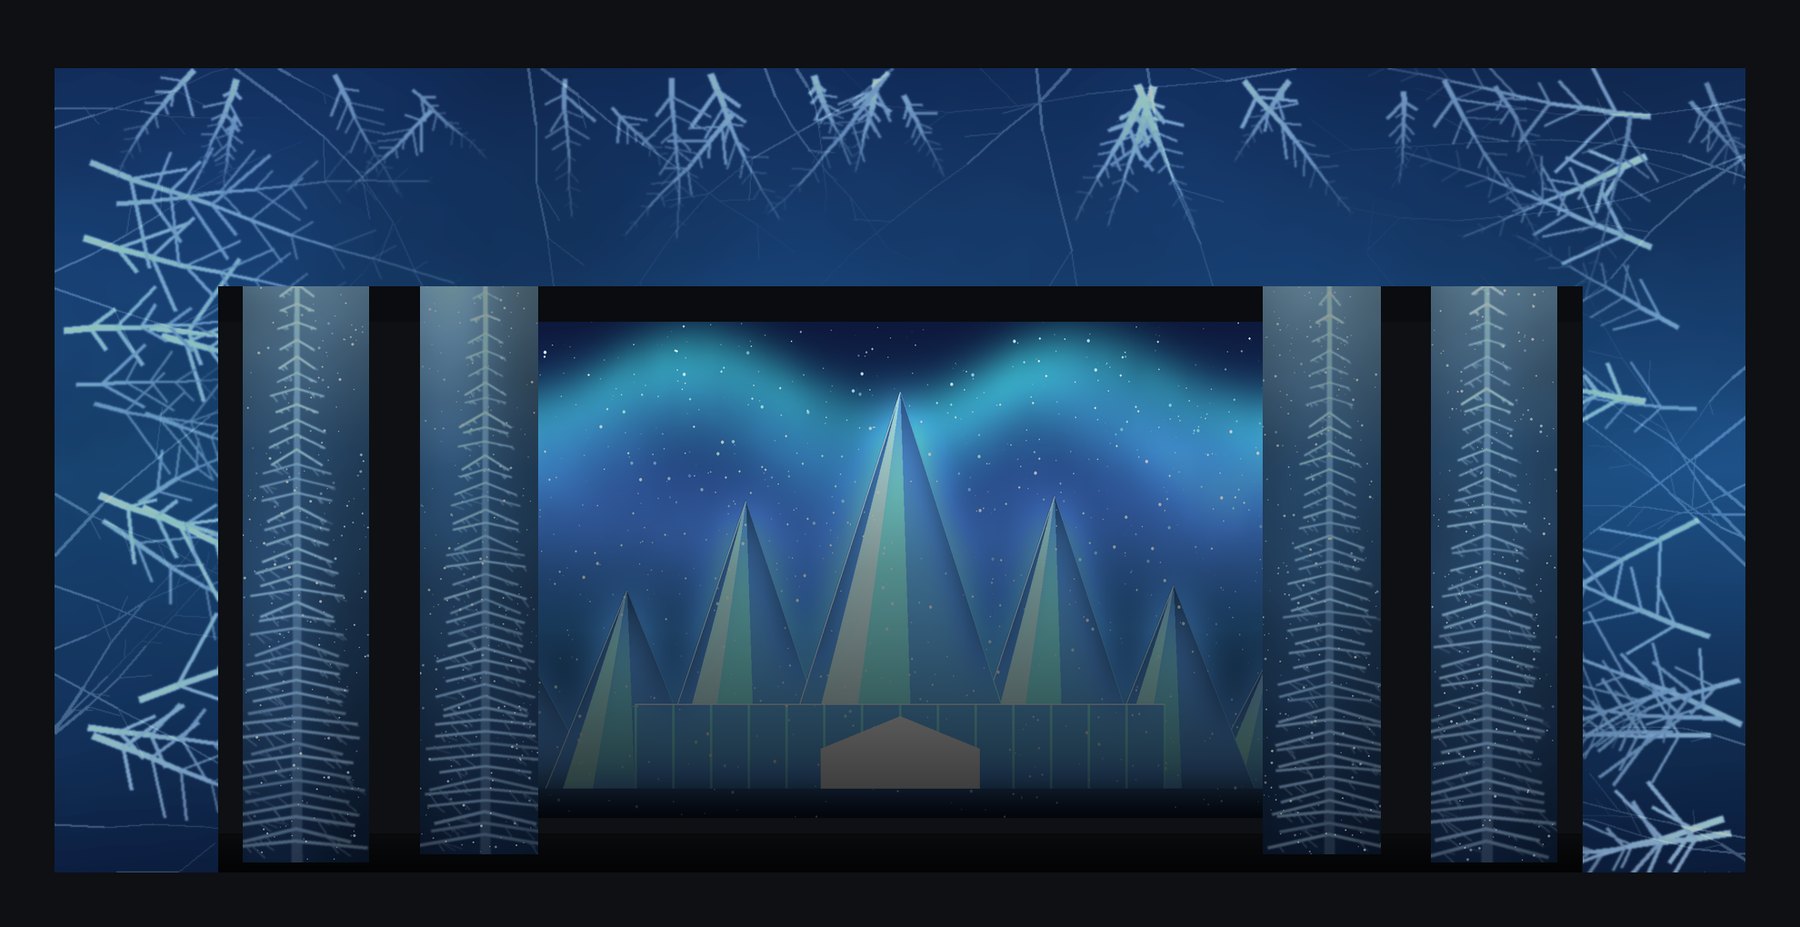
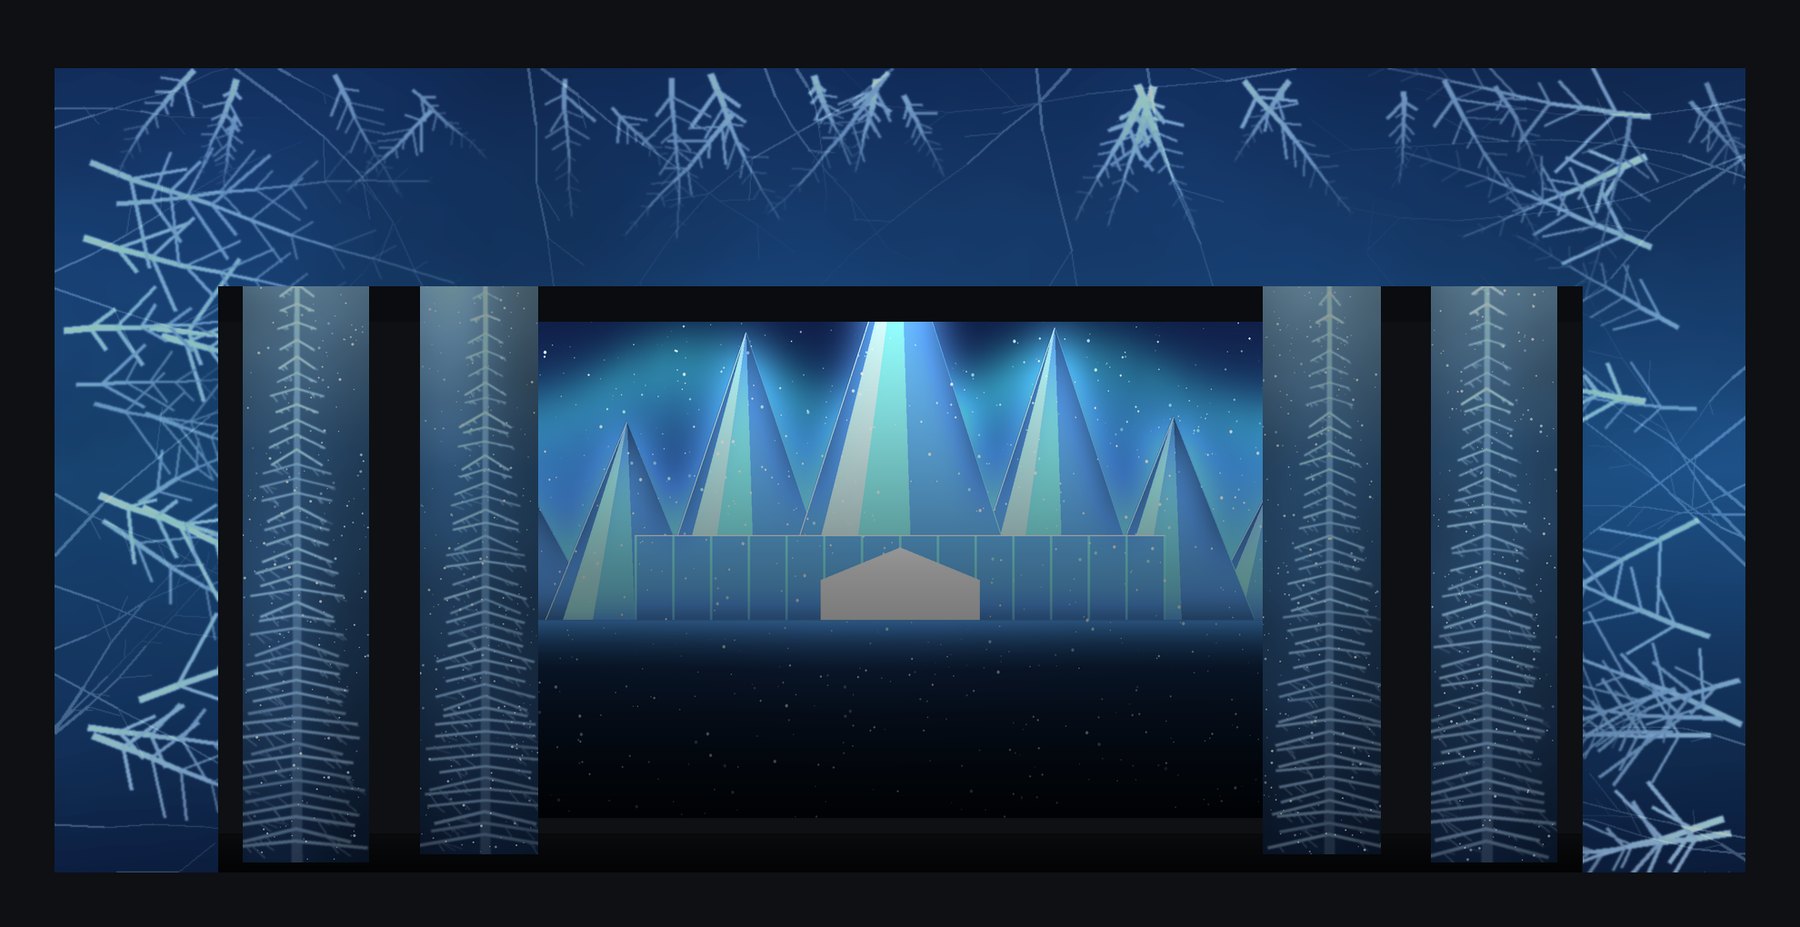
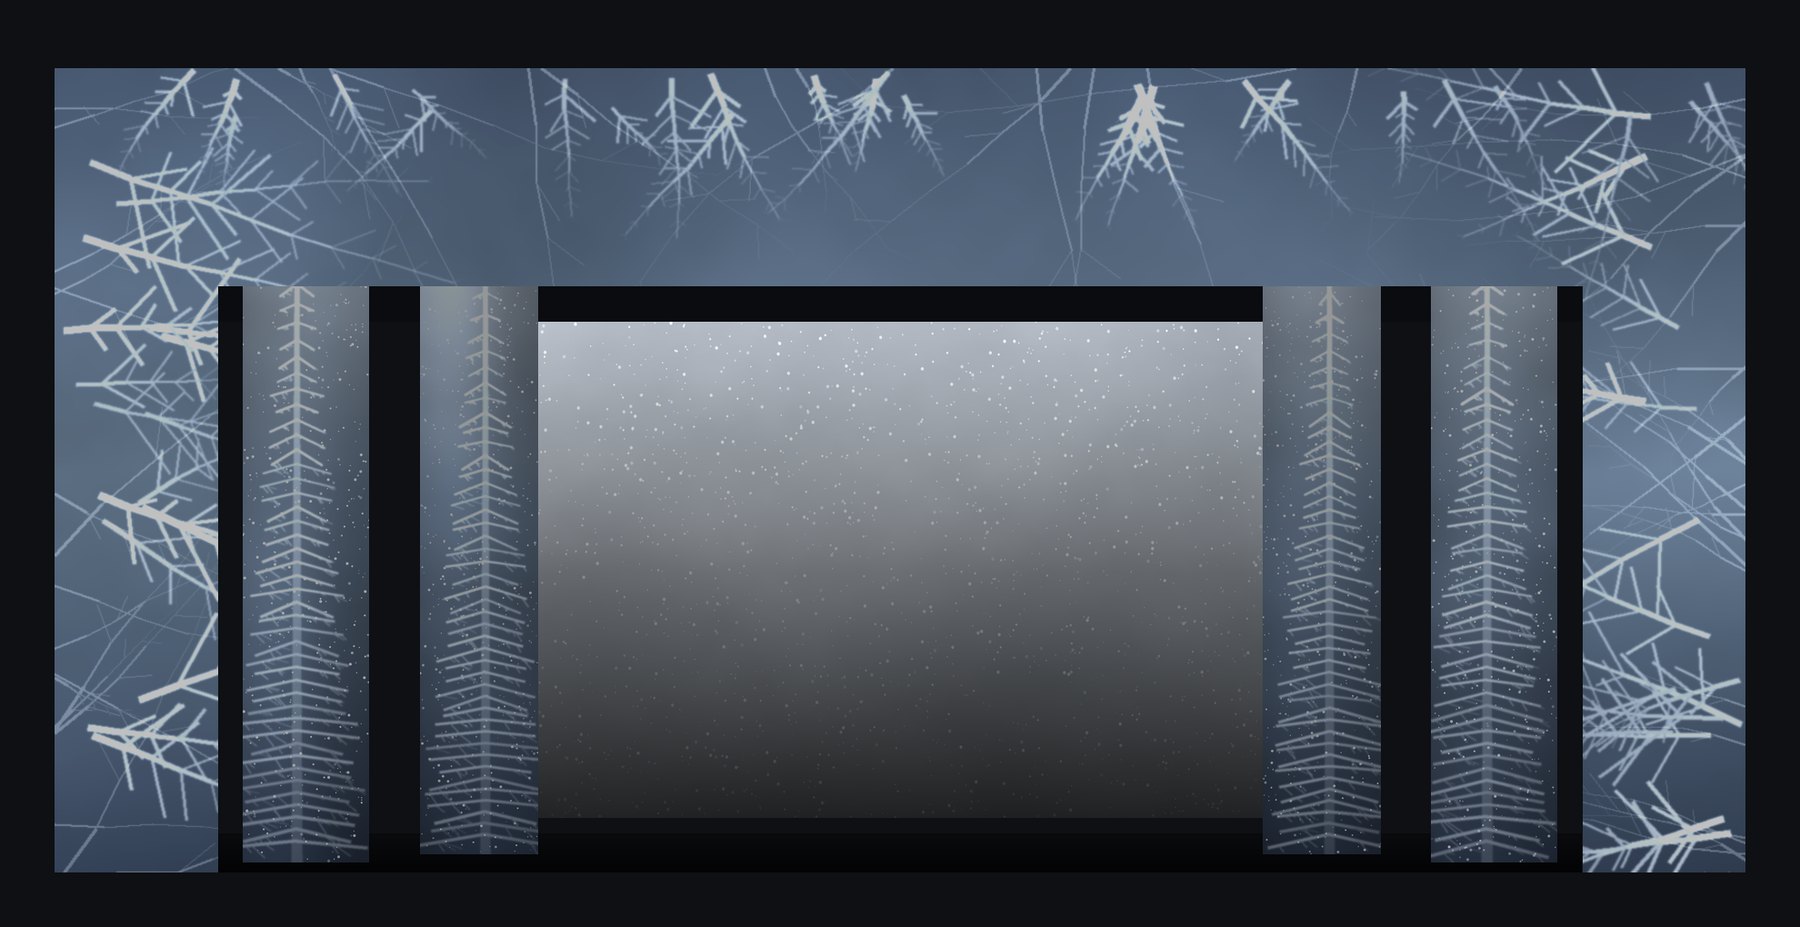
Four cues composited onto all six surfaces using the real staging geometry and the predicted
foot-lamberts. The artwork is placeholder — generated to carry the right
palette, density and compositional weight, not to stand in for a designer. Judge these for
legibility, contrast between surfaces and where the eye goes.
Let It Go — the content as built. Every surface at full value.
This is what the edit suite shows and it is not what the audience sees.
The same cue, honestly. Each surface scaled to its predicted
foot-lamberts, cyc carrying its real 6.5:1 gradient. The aurora survives at the top where the
lens puts 19.7 fL. The ice palace, sitting where the cyc delivers 3.0 fL, collapses.
The most useful frame in the set
The palace is the image the entire number is built around, and at the bottom of the cyc it
is gone. The fix is not more lumens — it is composition.
Recomposed for the gradient. Palace lifted into the 15–26′
band where the light is, sky darkened below it. Nothing changed about the rig; the dark lower
third now reads as night instead of as a fault.
Colder by the Minute. The one cue asking for pale imagery
everywhere at once, and therefore the cue that finds your ceiling. White on the surround at
14.2 fL sits visibly in front of white on the cyc away from its bright top band. Expect to pull the
surround down rather than push the cyc up.
Finale. The surround carries the temperature change — frame to
timber and gold, trees to green, cyc to summer sky. Note the fjord waterline: the same 3.0 fL
floor that ate the ice palace eats it too. Keep every warm horizon high in the frame.
Two things in these frames are deliberate
The band of unlit cloth above the lit cyc is real. The header hides the top of the 30′ cyc, but not all of it: from a 5′ eye about 1.3′ of bare cloth shows between the top of the Epson’s image and the underside of the header, and a border or a black top band has to take it. The dark slot between each leg pair is the 2.15 ft shadow margin doing its job — and it is mostly wing space, not cyc, because the upstage legs land within four inches of the cyc’s apparent edges. Neither is a rendering artefact.
A lit monitor also flatters the dim end of the cyc more than a dark house will. If a passage
looks marginal here, it is worse in the room.
04
Choosing the surfaces
Four properties decide whether a scenic surface takes projection well. They are worth stating
plainly because three of them are invisible until the projectors come on, and by then the
scenery is built.
What a projection surface has to be
Property
Target
What goes wrong
Matte
Zero sheen. Flat latex or purpose-made screen paint only.
Any eggshell or satin gives a specular hotspot that follows each viewer's seat. It cannot be fixed in QLab.
Neutral
A true white, not a warm or cool one.
Warm-white primer pulls the frozen blues grey-green. Every ice cue in Act I is fighting it.
Flat and still
Drum-tight, mechanically restrained top and bottom.
Two inches of drift is two inches of misregistration. Soft goods that swing cannot hold a warp for a two-week run.
Fire retardant
IFR fabric, or FR-treated with a certificate on file.
Your fire marshal will ask, and a 1,200 ft² painted drop is exactly what they ask about.
Gain, and why 0.9 is worth paying for
Screen gain is how much of the light a surface returns toward the audience. Unprimed muslin
sits around 0.7–0.8; a purpose-made front-projection surface such as Rosco's Front White
is 0.90 with a 170° viewing angle. That is roughly a 12% brightness gain
over good muslin for no extra lumens, and the wide viewing angle matters in a proscenium house
where a third of the audience is well off centre.
The trade to know about: high-gain surfaces also return ambient and spill light more
efficiently. That is fine here because the design already keeps front light off the projection
surfaces — see Section 15.
A grey portal is worth a test
The TITANs are 2,000:1 full-on/off, which is modest, and the surround has 20.7 fL of headroom
— more than this design needs. A light grey surface on the portal only
(gain ~0.6) would cost you about 5 fL you are not using and would meaningfully reject the stage-light
spill that otherwise raises the black floor on the frame. Paint two sample boards, put them side by
side under the actual rig at a dark-house call, and decide with your eyes. Do not do this to the
cyc — that surface needs every foot-lambert it has.
05
Build recommendations
The portal surround — build it as three units, not one
A 62′×29.5′ piece with a 50′×21.5′ hole in it is an awkward
object to build, hang, store and transport, and you never need the middle of it.
Against a 50′×21.5′ opening the frame band is a header 62′×8′
and two side bands 6′×21.5′. Build those three pieces, assemble them in place, and the hole
takes care of itself.
Portal surround — three units
Unit
Size
Recommended build
Approx. weight
PORTAL-HEAD
62′ × 8′
Six 10′4″×8′ SEG fabric frames, or six hard-covered Hollywood flats bolted edge to edge. Six divides 62′ evenly and keeps every unit inside a standard 4×8 sheet layout.
~145 lb / ~600 lb
PORTAL-SR
6′ × 21.5′
One SEG frame, or two 6′×10′9″ Hollywood flats stacked
~42 lb / ~190 lb
PORTAL-SL
6′ × 21.5′
As SR, mirrored
~42 lb / ~190 lb
First choice — SEG fabric frames. An extruded aluminium frame with a
silicone-edged IFR projection fabric that zips into a channel and tensions drum-tight. They are
light, they are dead flat, the fabric is replaceable if it is damaged mid-run, and they are the
closest thing to a purpose-built projection surface you can hang as scenery. They cost more than
lumber and they are the right call for a show whose whole design depends on register holding for
two weeks.
Second choice — hard-covered Hollywood flats. 1×3 on-edge framing
with a 1/4″ ply or lauan skin. Stiffer than a traditional Broadway flat and much less prone
to racking at this size. The catch is seams: six flats across the header gives you five vertical
joints, and under projection a telegraphed joint reads as a line across the frame. Skim the joints
with joint compound, sand flat, then prime. Budget real shop time for that step — it is what
separates a good-looking portal from an obviously-built one.
Avoid a soft painted drop with a cut-out. It is the cheapest option and it
will move. Every time the HVAC cycles or a door opens backstage, your warp is wrong.
The legs — rigid frames, restrained top and bottom
Four panels 5′ wide and 25′ tall. The proportions are the problem: at 5:1 these are
slender enough to flex, sail and swing, and each one carries an independently warped projection
region that a two-inch movement ruins.
Leg panels — three ways to build them
Approach
Weight ea.
Verdict
Aluminium frame + stretched IFR fabric 1.5″ square tube perimeter with a mid-rail, SEG or laced fabric
~60–80 lb
recommended Light enough to fly on a spot line, dead flat, and the low mass makes bottom restraint easy.
Hollywood flat 1×3 on edge, 1/4″ ply skin
~190 lb
workable Rigid and cheap, but 25′ of lever arm at that weight needs real rigging and real bottom hardware.
Soft leg, chain-pocketed
~15 lb
no A chain pocket stops it flapping, not moving. It will not hold register.
Restraint is the whole game. Fly each panel from a batten or spot line with a
pipe pocket or hanging irons at the top, and positively tie the bottom — floor
plates and stage screws, or a bottom pipe tied off to the deck. Do not rely on weight alone.
Actors brush past legs; a panel that can move six inches will, on opening night.
Give the offstage edge of each panel a 2–3″ black border in paint
or gaffer. Canvas edges are never straight, and the mask feather in the media assumes a soft edge
to land on rather than a hard bright sliver on the wing wall.
The cyclorama
A 50′×30′ front-projection surface, and the one place to spend money on
material rather than construction. Only 45.1′×25.4′ of it is ever lit (Section 07), but the full cloth still has to be there: the unlit margin is what keeps the frame of the picture off the wing walls and the grid.
Vinyl or poly cyc, IFR, seamless. Rosco's vinyl cycs run seamless to
40′ with ultrasonically welded joins beyond that — invisible at normal viewing
distance and, unlike sewn muslin, they do not wrinkle. Rose Brand's 128″ Poly Cyc IFR
is the sewn-panel equivalent and a reasonable budget step down.
Front White (gain 0.90, 170°) if the budget reaches it. The extra gain
and the wide viewing angle both pay off here, and the design never rear-projects.
Tension it properly. Pipe or chain pocket at the bottom, tied off at both
bottom corners, and pulled out at the sides. A hung cyc bellies, and a bellying cyc is why the
plot specifies a Bézier warp with an 8×8 control grid rather than simple corner pinning.
Do not paint a cyc you intend to project on unless it arrives unprimed and
the manufacturer says to. Factory finish beats shop finish on this surface every time.
Paint and finish
Rosco Projection Screen Paint on the portal and legs, or a premium flat
(not matte, not eggshell) interior latex in a neutral white. Two coats over a sanded, primed
surface.
Roll, do not spray, unless your shop sprays well. Roller stipple is
invisible under projection; spray orange-peel is not.
Test before you commit 1,800 ft². Paint two 4′×8′
sample boards, hang them in the actual positions, and look at them under the actual projectors
with actual content. Half an hour here saves a repaint.
Fire retardancy: use FR paint or FR-treat after painting, and keep the
certificate with the show paperwork.
Two clearances to walk with a tape
Epson to the upstage legs. The Epson sits on line set 14 at 24.92′ trim; LEG-*2 hangs on set 12. That is 1.97 ft of clearance between a 64 lb projector and the top of a 25′ panel — the tightest the pair can be without the leg pipe entering the Epson’s own light. Set 13 would leave 0.99 ft, which is too little to hang and focus in. The projector cannot move within that: its fixed lens decides the throw, and the throw decides the position.
Wing width. The downstage legs sit 26′ off centre. The plan shows
28′ of wing stage right, so they fit with room to spare; confirm stage left matches before
the panels are built.
06
The venue, surveyed
These come off the Corner Canyon house plan rather than from assumption, and they are what the
generator in the asset pack is loaded with. Three of them overturned earlier working figures, and
two of those changed the plot.
Corner Canyon High School Performing Arts
#
Measurement
Value
What it decides
M1
Proscenium opening
50 × 21.5 ft
Mask cut-out. Wider and a good deal shorter than a typical assumption — the header band is 8′ tall, the side bands 6′.
M2
Usable stage depth — cyc on line set 30
29.6 ft
With the Epson on line set 14 this fixes the throw at 15.79′, because the lens is not adjustable.
M3
Leg line sets used
6 and 12 5.9 / 11.8 ft
Real line sets rather than invented positions. Both downstage of the Epson.
M4
Tech booth to plaster line
75 ft
TITAN lens choice and every foreshortening figure. Spot booth is 89′.
M5
TITAN lens height
10 ft above house 6.5 ft above deck
The single most consequential number on the plan. See below.
M6
Stage deck above house floor
3 ft 6 in
Converts M5 into a deck-relative height.
M7
Fly to roof / electric trim
41 ft / 18 ft
The Epson needs 24.92′ of trim — well inside the fly, but 7′ above the electrics.
M8
Apron / pit / SR wing
7 / 16 / 28 ft
Wing space is ample; the legs at 26′ off centre fit comfortably.
The low lens is the fact to design around
Ten feet above the house floor puts the TITAN lens 6.5 feet above the stage deck
— roughly the eye height of an actor standing on it. Three consequences follow, and none of
them is a reason to move the units.
The units need about 31% of upward lens shift to lift a 34.9′-tall raster
off a lens sitting 6.5′ up. Verify the TITAN's vertical shift range covers that before
load-in. If it does not, the units get tilted and QLab warps out the keystone, which costs
pixels and brightness you would rather keep.
Actors can shadow the legs. At lens height, a six-foot performer standing in
the beam path blocks roughly the bottom six feet of a leg behind them. The legs sit
21–26′ off centre so this only happens to someone well into the wings, and the bottom
six feet of a 25′ panel is the least important part of it — but stage management should
know the corridor exists. The surround cannot be shadowed at all, because every actor is upstage of
it, and the cyc is fed from over the stage.
The low angle actually helps overhead. A lens near stage level looks up
through the opening, so less of a tall leg is cropped by the header than a high FOH position would
crop. The downstage legs read to about 22.7′ of their 25′, the upstage pair to 23.9′.
07
Projector plot
Two Digital Projection TITAN 1080p Quad 2000 and one Epson EB-PQ2216W. Fifty-six thousand
lumens in the room, and the rig is lens-limited, not lumen-limited — every
lens wants a long throw, which decides the whole plot.
Inventory
Unit
Output
Native
Light source
Lens
Weight
TITAN ×2
20,000 lm
1920×1080, 16:9
4 × 450W metal halide
109-236, 1.16–1.49:1
86 lb
EB-PQ2216W
16,000 lm
1080p ×3 → 4K shift
Laser, 20,000 hr
ELPLX02 0.35:1
64 lb
The plot
Unit
Position
Covers
Lens / throw
Result
P1 — Epson
Line set 14, 13.81′ upstage, inverted, 24.92′ trim, minimum vertical shift
CYC
ELPLX02 0.35:1 15.79′ throw lights 45.1 × 25.4′
10.7 fL avg 85.1 px/ft shadow reach 3.8′
P2 + P3 — TITAN ×2
Tech booth, stacked and converged on one raster, 31% up-shift
PORTAL + all four LEGS
109-236 @ 1.21:1 75′ throw lights 62.0 × 34.88′
portal 14.2 fL legs 12.2 / 10.6 fL
The Epson belongs on the cyc for four reasons that all point the same way: its
0.35:1 lens is the only glass in the kit that can frame a 50′ image from over the stage
rather than from the house; it puts 85 px/ft on the surface against a TITAN's 38, on the one
surface the audience studies; its laser will not drift in colour across a two-week run; and its
native contrast is far better than the TITANs' 2,000:1, which matters enormously on a cyc that
spends half the show in near-blackout.
No TITAN can do that job. At a 75′ FOH the cyc is 105′ away, and
zoomed all the way in the narrowest image a TITAN makes at that distance is 56′ wide —
it cannot frame a 50′ cyc. Worse, at a 6.5′ lens height the shadow reach from out front
is effectively the whole stage: an actor anywhere in the beam would print on the cyc at close to
full size.
Both TITANs stack on one raster. There is no spare in this kit, which makes
the lamp discipline below a genuine operational requirement rather than good practice.
Two things the kit does not quite cover
Both are consequences of fixed geometry, both are knowable now, and both have a scenic answer
that costs nothing. Neither is a reason to change the plot.
Lit area against physical surface
Surface
Physical
Lit
Shortfall
Why
PORTAL
62.0 × 29.5 ft
62.0 × 34.88 ft
none solved
The stock 1.39 lens tops out at 54′ from 75′. The 109-236 at 1.21:1 covers the full width, and the 5.4′ of vertical overspill masks off.
CYC
50.0 × 30.0 ft
45.1 × 25.4 ft
2.45 ft each side 4.6 ft vertically
A fixed 0.35:1 lens at a 15.79′ throw makes exactly 45.10′. Throw and image size are the same number.
The surround is solved by glass, not by scenery. Your side bands are only
6′ wide to begin with — a 50′ opening in a 62′ canvas — so the stock
lens leaving 4′ of each band dark would have gutted the frame rather than trimmed it. The
DP 109-236 HB zoom (1.16–1.49:1) run at 1.21 covers the full 62′ from
the tech booth. It is the one purchase this plot depends on. Order it early enough to hang with it,
not after.
The cyc margin is unavoidable. The unlit strip is 2.45′ at each side, 3.81′ above the image and 0.81′ below, and it cannot be fixed without moving a unit whose position the lens has already decided. Sideways this barely matters: the upstage legs mask the cyc almost exactly to its apparent edges, so the side margin is hidden. The top is the one to deal with. The header covers the cyc down to about 21.5′ apparent, and the image tops out around 20.2′ apparent, which leaves roughly 1.3′ of bare cloth showing in a band right under the header. Hang a black border or a teaser to take it. Do not try to solve it in content — black pixels and no pixels look identical, but bare unlit cloth catches stage-light spill and glows grey.
If you can free line set 13, moving the Epson one set downstage grows the lit area to 47.9′×27.0′ and closes most of the margin. It costs you clearance: 0.99′ between the projector and the leg-2 pipe instead of 1.97′. Worth measuring on the day; not worth assuming.
Three things this kit will do to you
Colour matching. Stacking two TITANs means matching eight metal halide
lamps across two heads, and they drift apart as they age. Fit fresh lamps in both before
tech, log their hours together, and re-check the match at every dark-house call. This is the
biggest operational risk in the rig, and it is why the laser unit goes where a colour shift would
show most.
Power and heat. Two TITANs at FOH is 3.6 kW of lamp before ballasts and
fans — budget about 5 kW and roughly 42 A at 120 V, and listen to what
eight 450W bulbs and their cooling do to a quiet scene.
Black level. 2,000:1 full-on/off is modest. Put a QLab blackout on the portal
at tech and look at what the TITANs actually leave on the canvas. If there is a visible grey
field, use the units' mechanical douser for true blackouts rather than fading in software.
08
The four optical facts the design rests on
One — stack the pairs, never blend them side by side
Both surfaces are close to 2:1 — 50×30 and 62×29.5 — and every projector available
is 1.78:1. The surface is wider than the projector, so sizing is width-driven:
set the raster width to the coverage width and mask the vertical overspill.
Run that through a side-by-side pair and it falls apart. Two units each covering 33′ of a
62′ surround throw only 18.6′ of height on a 29.5′ surface. Force them to cover the full
height and each raster becomes 52′ wide, overlapping by 42′ — an accidental stack
with extra steps, which QLab's blend then dims back down. Stack instead: same
footprint, double the lumens, no seam, and a dead unit leaves you at half brightness rather than
half a picture.
Two — focus is a non-issue, and the reason matters
One FOH lens holds the surround at 0′ and the legs at 5.9′ and 11.8′. Blur on the
surface is governed by one relationship, and throw distance cancels out of it entirely:
blur = Δ ÷ ( N × (1 + m) ) where
m = image width ÷ panel width
A 62′-wide image off a 0.67″ DMD is about 1,310× magnification, which makes the
blur vanishing: 0.07 px at the near legs, 0.14 px at the far ones. Focus on the
portal frame and the legs come along free.
The rule this exposes: blur scales as the inverse square of coverage width.
Wide coverage means a short lens and enormous depth of field; narrow coverage with a long lens is
where focus actually bites. Cover 62′ and a 12-foot depth spread costs 0.14 px; cover
20′ with a long lens from the same position and it costs 1.6 px. That
is the quiet reason dedicated long-lens leg projectors are a worse idea than they look.
Three — the cyc gradient is geometry, not a fault
The 0.35:1 lens sits 15.79′ from the cyc and 24.92′ above the deck — 12.2′ above the centre of its own image. Light hits the top
almost square-on from close range and the bottom obliquely from half again as far. Illuminance
follows cos(incidence) ÷ distance²:
Cyc brightness profile
Height above deck
Incidence
Distance
Set 14 — trim 24.92′
Set 13 — trim 26.5′
Top of lit area — 26.19′
1.6°
15.8 ft
19.7 fL
17.5 fL
Centre — 13.50′
37.8°
20.0 ft
9.7 fL
8.6 fL
Bottom of lit area — 0.81′
57.6°
29.5 ft
3.0 fL
2.7 fL
Top-to-bottom ratio
6.5 : 1as plotted
6.5 : 1
The gradient is the same 6.5:1 either way — moving the unit one line set
downstage buys lit area, not evenness, and costs about 2 fL everywhere because the same light
spreads over 13% more surface. Hang at minimum shift, around 24.92′ trim: racking the shift
up to mount higher makes the gradient worse, not better, and buys almost nothing in shadow reach. Then decide
deliberately how much of the gradient to keep — the asset pack ships two correction masks
computed from this exact geometry, one halving it and one flattening it. Flattening pulls the
whole cyc to its dimmest reading, so half is usually the right trade. Measure with a meter
at five heights at tech before choosing.
Four — staggered legs break in two ways
Leg-on-leg shadow. The beam heading for the upstage leg has to get past the
downstage one, and whether it does is decided at the downstage leg's own plane. An earlier version
of this staging had them exactly tangent — no shadow at all, which sounds ideal and is the
worst place to be. Two inches of drift either opens a bare slot or drops a hard shadow line down
the upstage panel. The current positions carry 2.15 ft of real margin.
Panel behind the proscenium can never be lit. A leg reaching further off centre
than the FOH unit can see through the opening has a strip no front projector can reach.
From house centre the proscenium hides it and nobody notices. From the opposite side of the house
it is a dark stripe down the panel edge — visible to a whole block of the audience and
invisible from the tech table. The FOH reach is 26.97′ at 5.9′ upstage and
28.95′ at 11.8′; the legs sit at 26.00 and 20.39. Both checks run on every
rebuild of the asset pack and print clearance in feet.
09
QLab architecture
QLab 5's signal path runs Source → Cue → Stage → Region →
Route → Device. Build it in reverse — devices first, content last — and
nothing has to be redone.
The decision that makes this show work: one stage per surface, not one stage per
projector. Your designer thinks in surfaces; the cyc is a 2:1 canvas and a leg is a 1:5
canvas, and those are what a video cue should target. The projectors are delivery, handled
entirely at the region and route layer. Change a projector, re-warp one region, and every cue in
the show still works.
Stage and route architecture
Stage
Size
Regions
Routed to
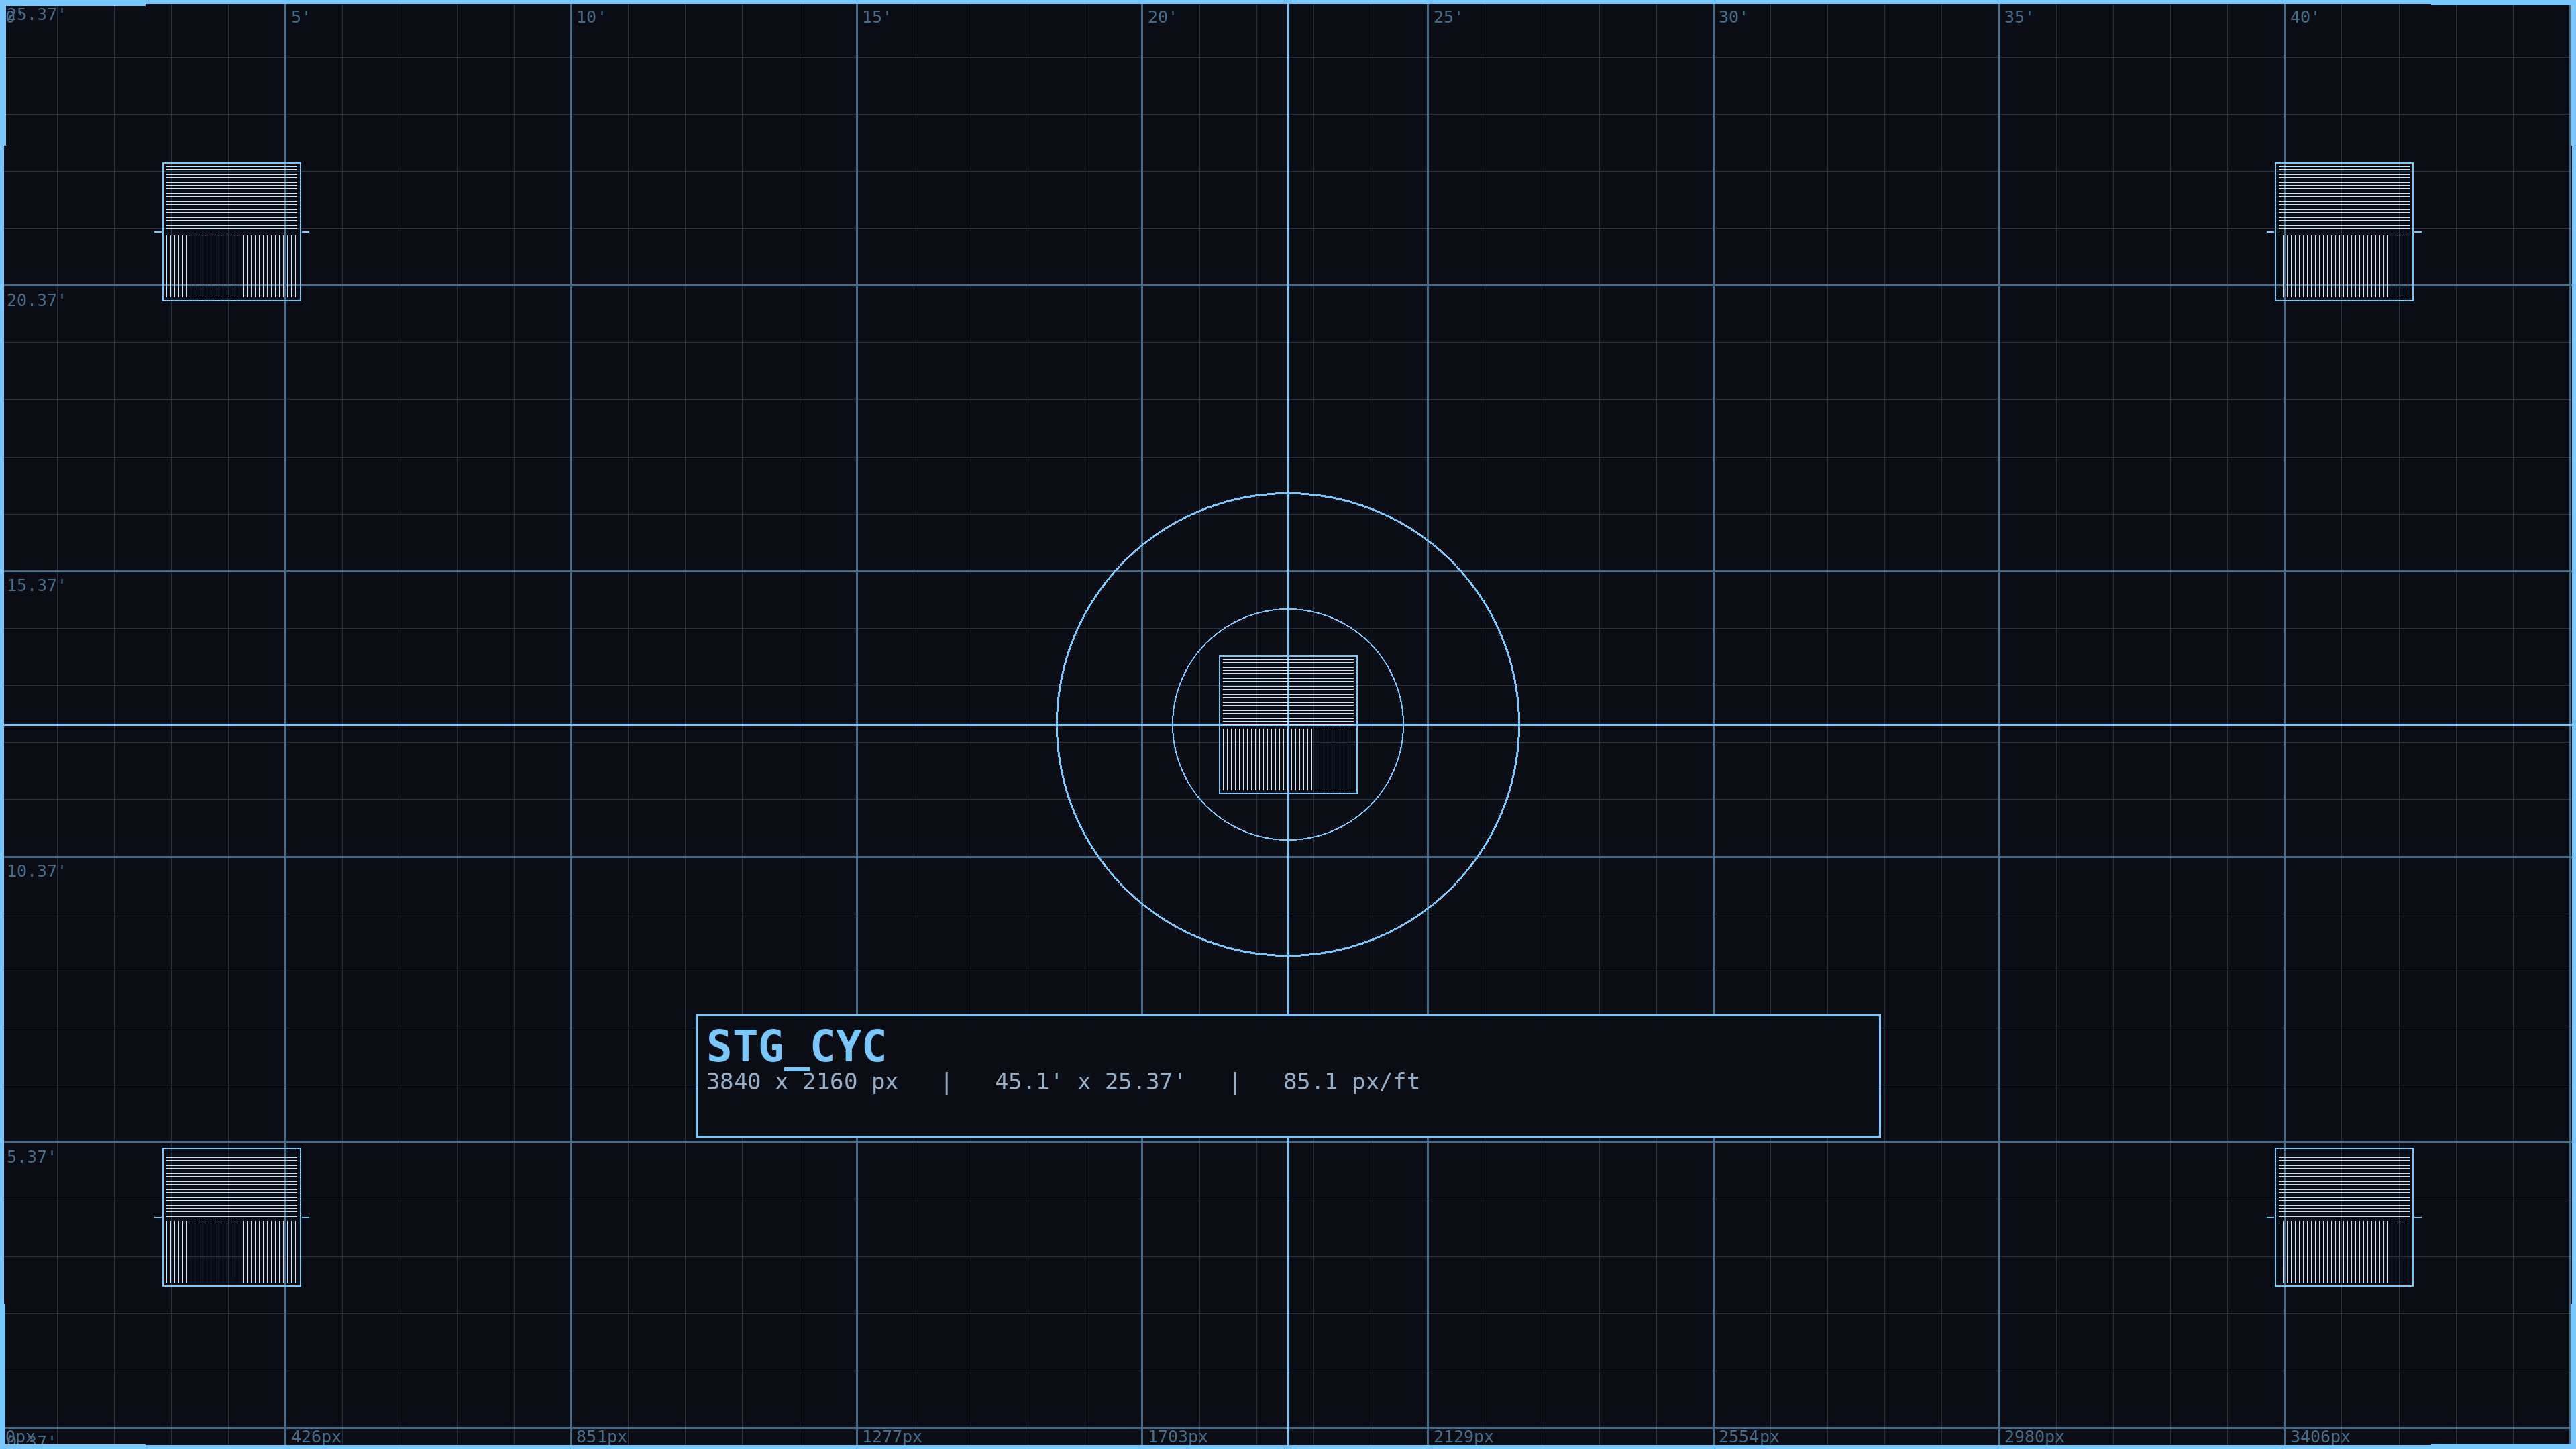
STG_CYC
3840 × 2160
one region, full stage
P1 Epson
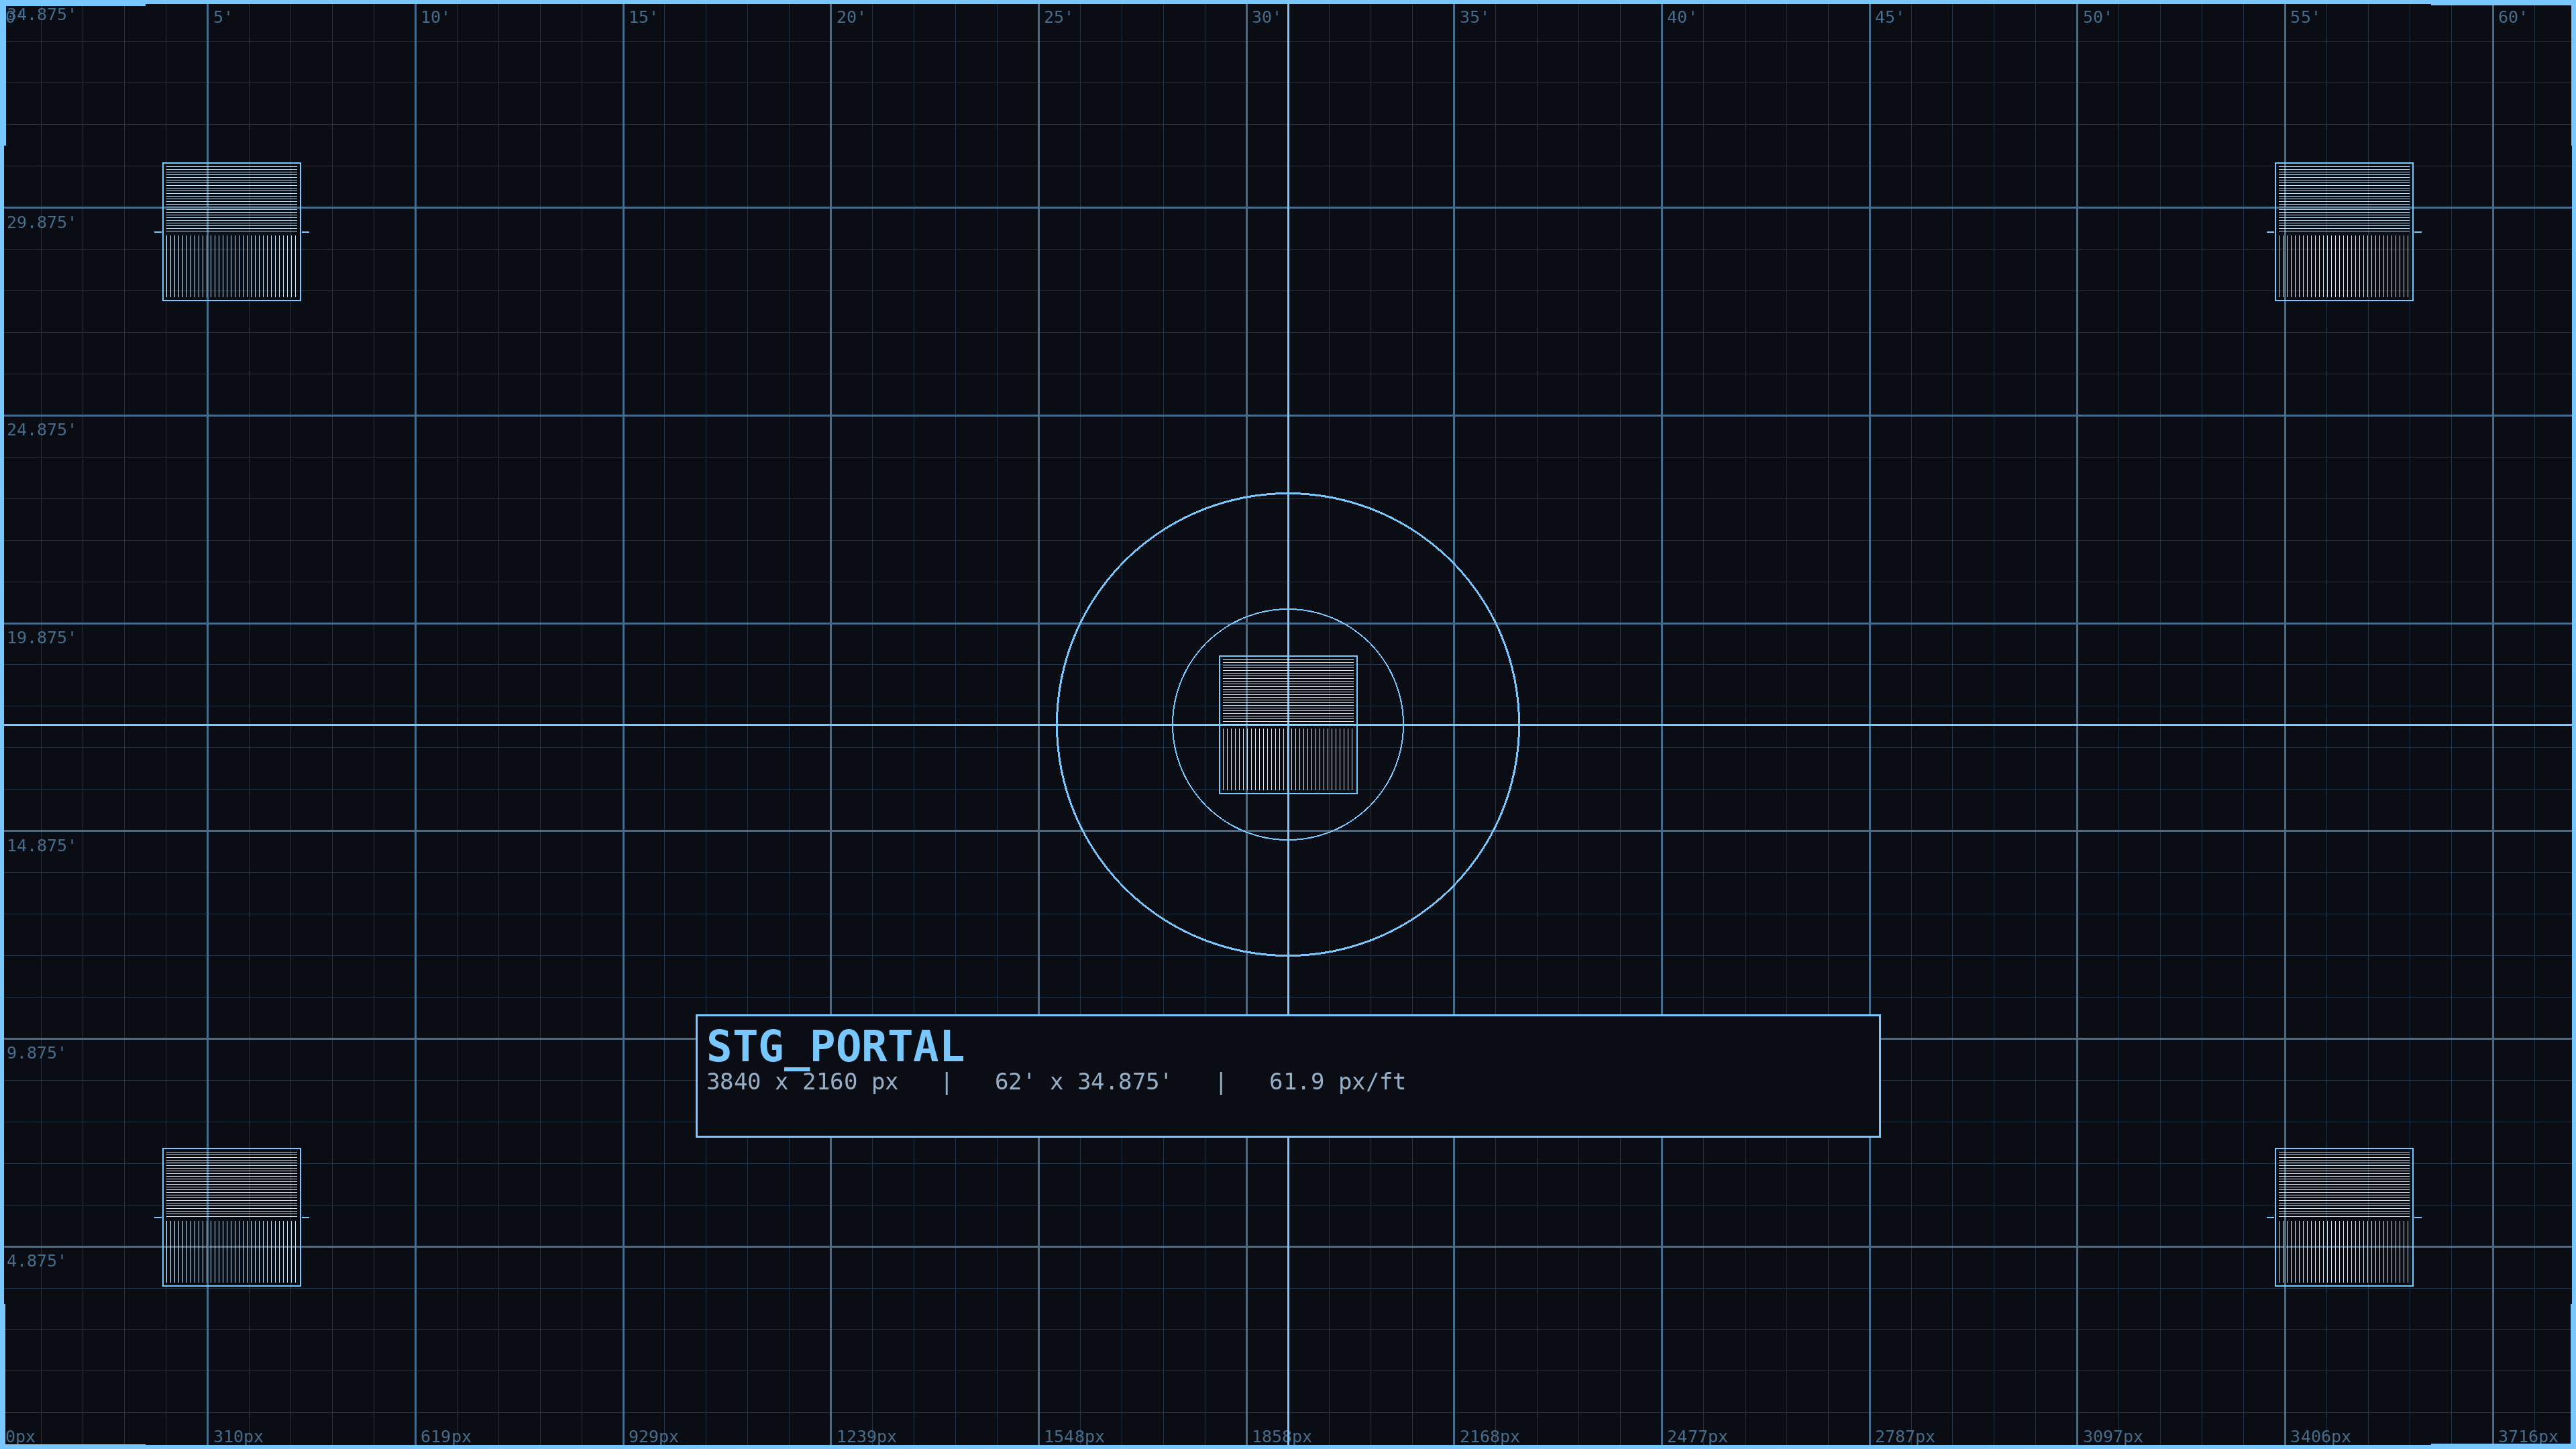
STG_PORTAL
3840 × 2160
PORT-A / B — both cover the whole stage, converged
P2, P3
STG_LEG_SR1
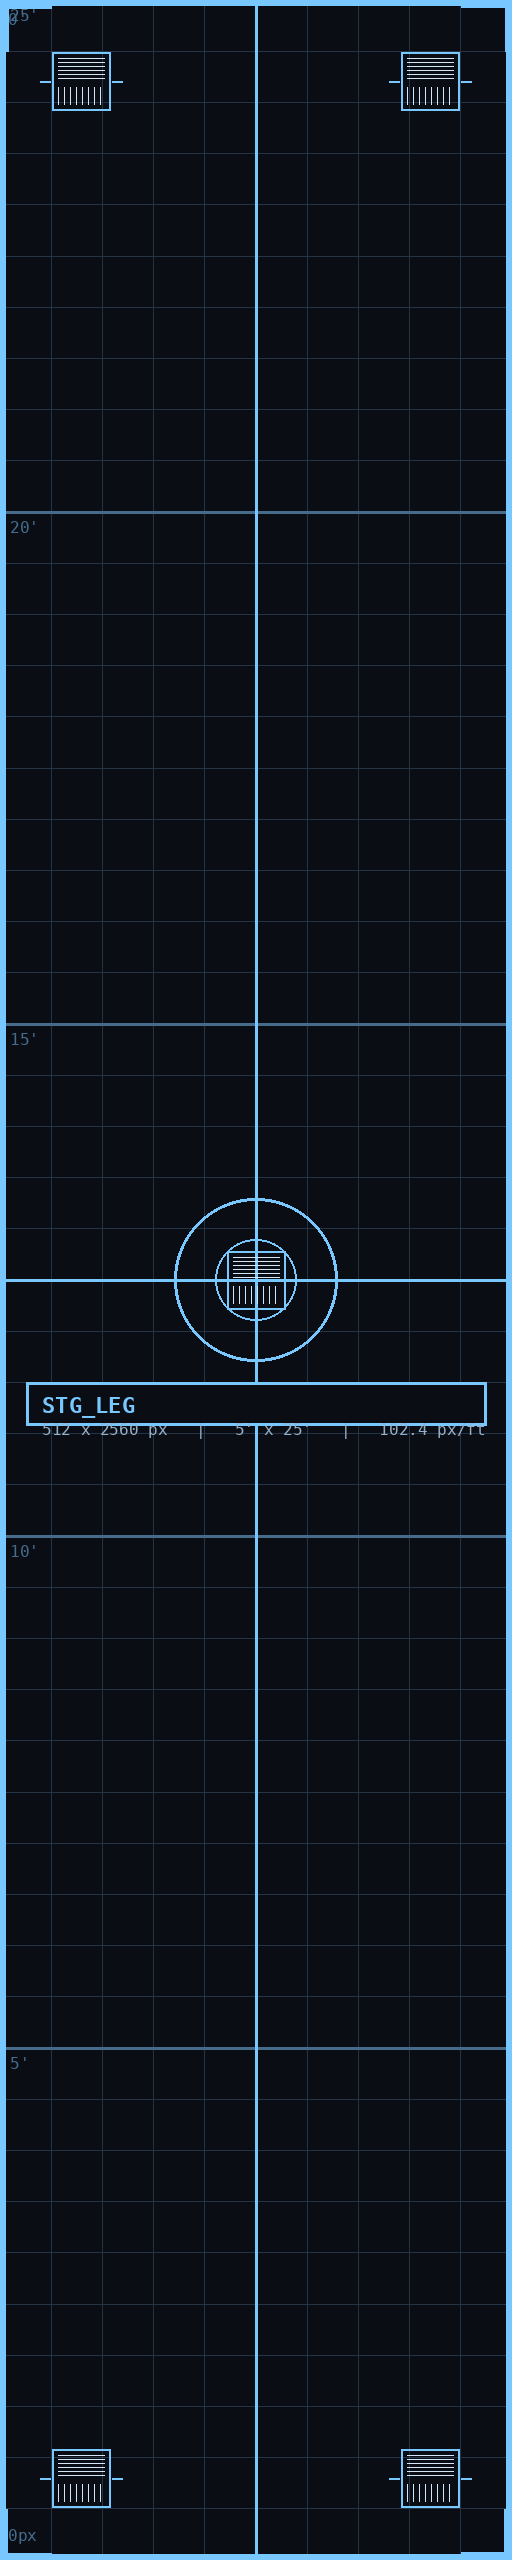
512 × 2560
one region ×3, converged
P2, P3, P4
STG_LEG_SR2
512 × 2560
one region ×3, converged
P2, P3, P4
STG_LEG_SL2
512 × 2560
one region ×3, converged
P2, P3, P4
STG_LEG_SL1
512 × 2560
one region ×3, converged
P2, P3, P4
STG_ALL
3840 × 2160
mirrors every region above
P1–P3
STG_ALL is a convenience stage whose regions duplicate
every other region's warp. Use it for blackouts, full-stage colour washes, the storm and the curtain
call — one cue lights every surface at once instead of six parallel cues.
Leg region warp corners in the FOH raster — type these in
Leg
tl
tr
br
bl
LEG-SR1
427, 828
715, 828
715, 2131
427, 2131
LEG-SR2
829, 828
1097, 828
1097, 2105
829, 2105
LEG-SL2
2743, 828
3011, 828
3011, 2105
2743, 2105
LEG-SL1
3125, 828
3413, 828
3413, 2131
3125, 2131
All four tops clamp to y=828, the bottom of the proscenium header. The panels are 25′ tall against a 21.5′ opening, so the top 2.3′ of the downstage pair and 1.1′ of the upstage pair is hidden behind it. Nothing you need to see goes up there. The bottoms stop at 2131 and 2105 rather than at the raster floor: the panels stand on the deck, but from a lens 6.5′ up the beam grazes under them and the last few inches of raster land on the stage floor instead. Warp to these numbers and the texture registers to the real panel.
10
Masks and content specification
Masks
Greyscale images at stage size: black hides, white shows, mid-grey dims proportionally. Since
QLab 5.6 a stage mask reloads live when the file on disk changes — keep Photoshop open at the
tech table and iterate the edge without touching the workspace.
Mask set
File
Size
Needed
Does
portal-frame-mask
3840×2160
always
White on the frame band, black across the opening. Without it the surround content sprays through onto the legs and cyc.
cyc-trim-mask
3840×2160
always
Feathered border trimming spill off the top, sides and bottom of the cyc.
cyc-gradient-mask-half
3840×2160
probably
Halves the 6.0:1 ultra-short-throw gradient. Decide with a meter.
leg-visible-LEG-*
512×2560
for the header
One per leg. At these positions no panel is masked sideways; the mask handles the top 2.3′ behind the header.
Keep a 2–3 inch black feather inside every physical edge.
Canvas edges are never straight and cloth moves; a mask cut exactly to the measured edge shows a
bright sliver on the wall the first time a fan runs.
Content delivery specification
Hand this to whoever makes content
Surface
Canvas
Aspect
Resolution
Notes
CYC
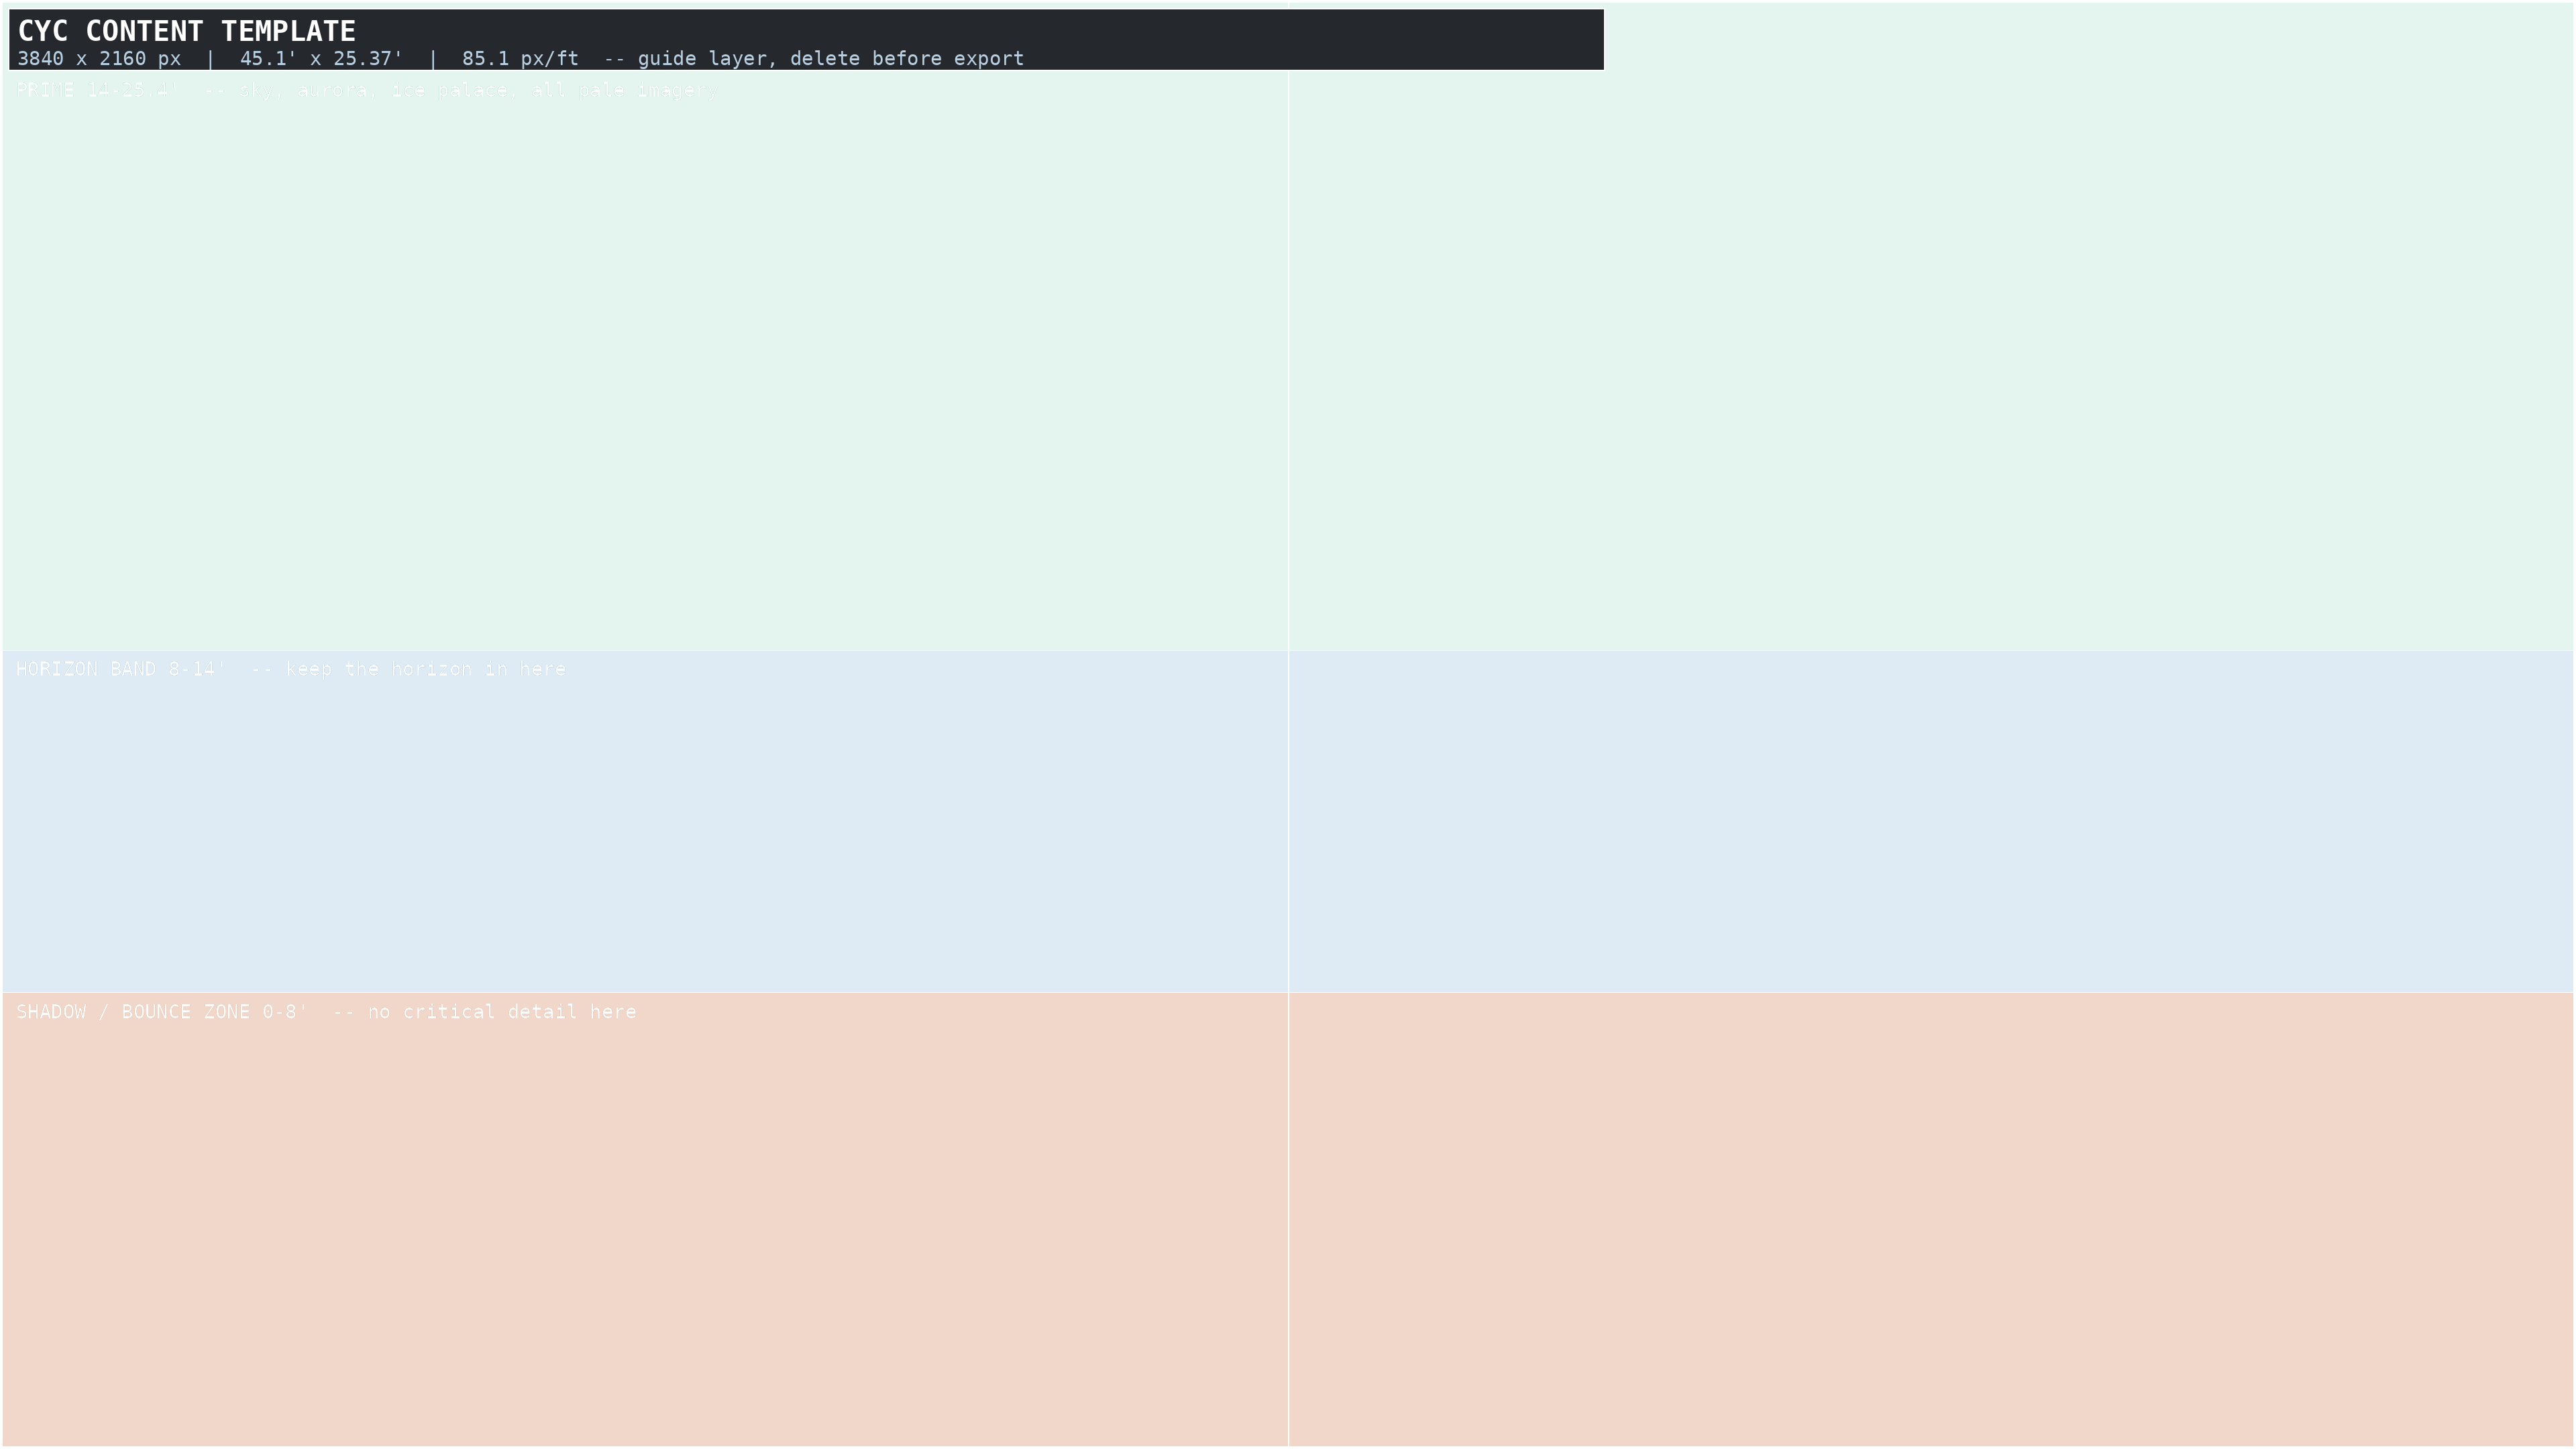
3840 × 2160
16 : 9
85.1 px/ft
Maps to the lit 45.1′ × 25.4′, not the whole 50×30 cloth. Highest detail; carries all pale imagery.
PORTAL
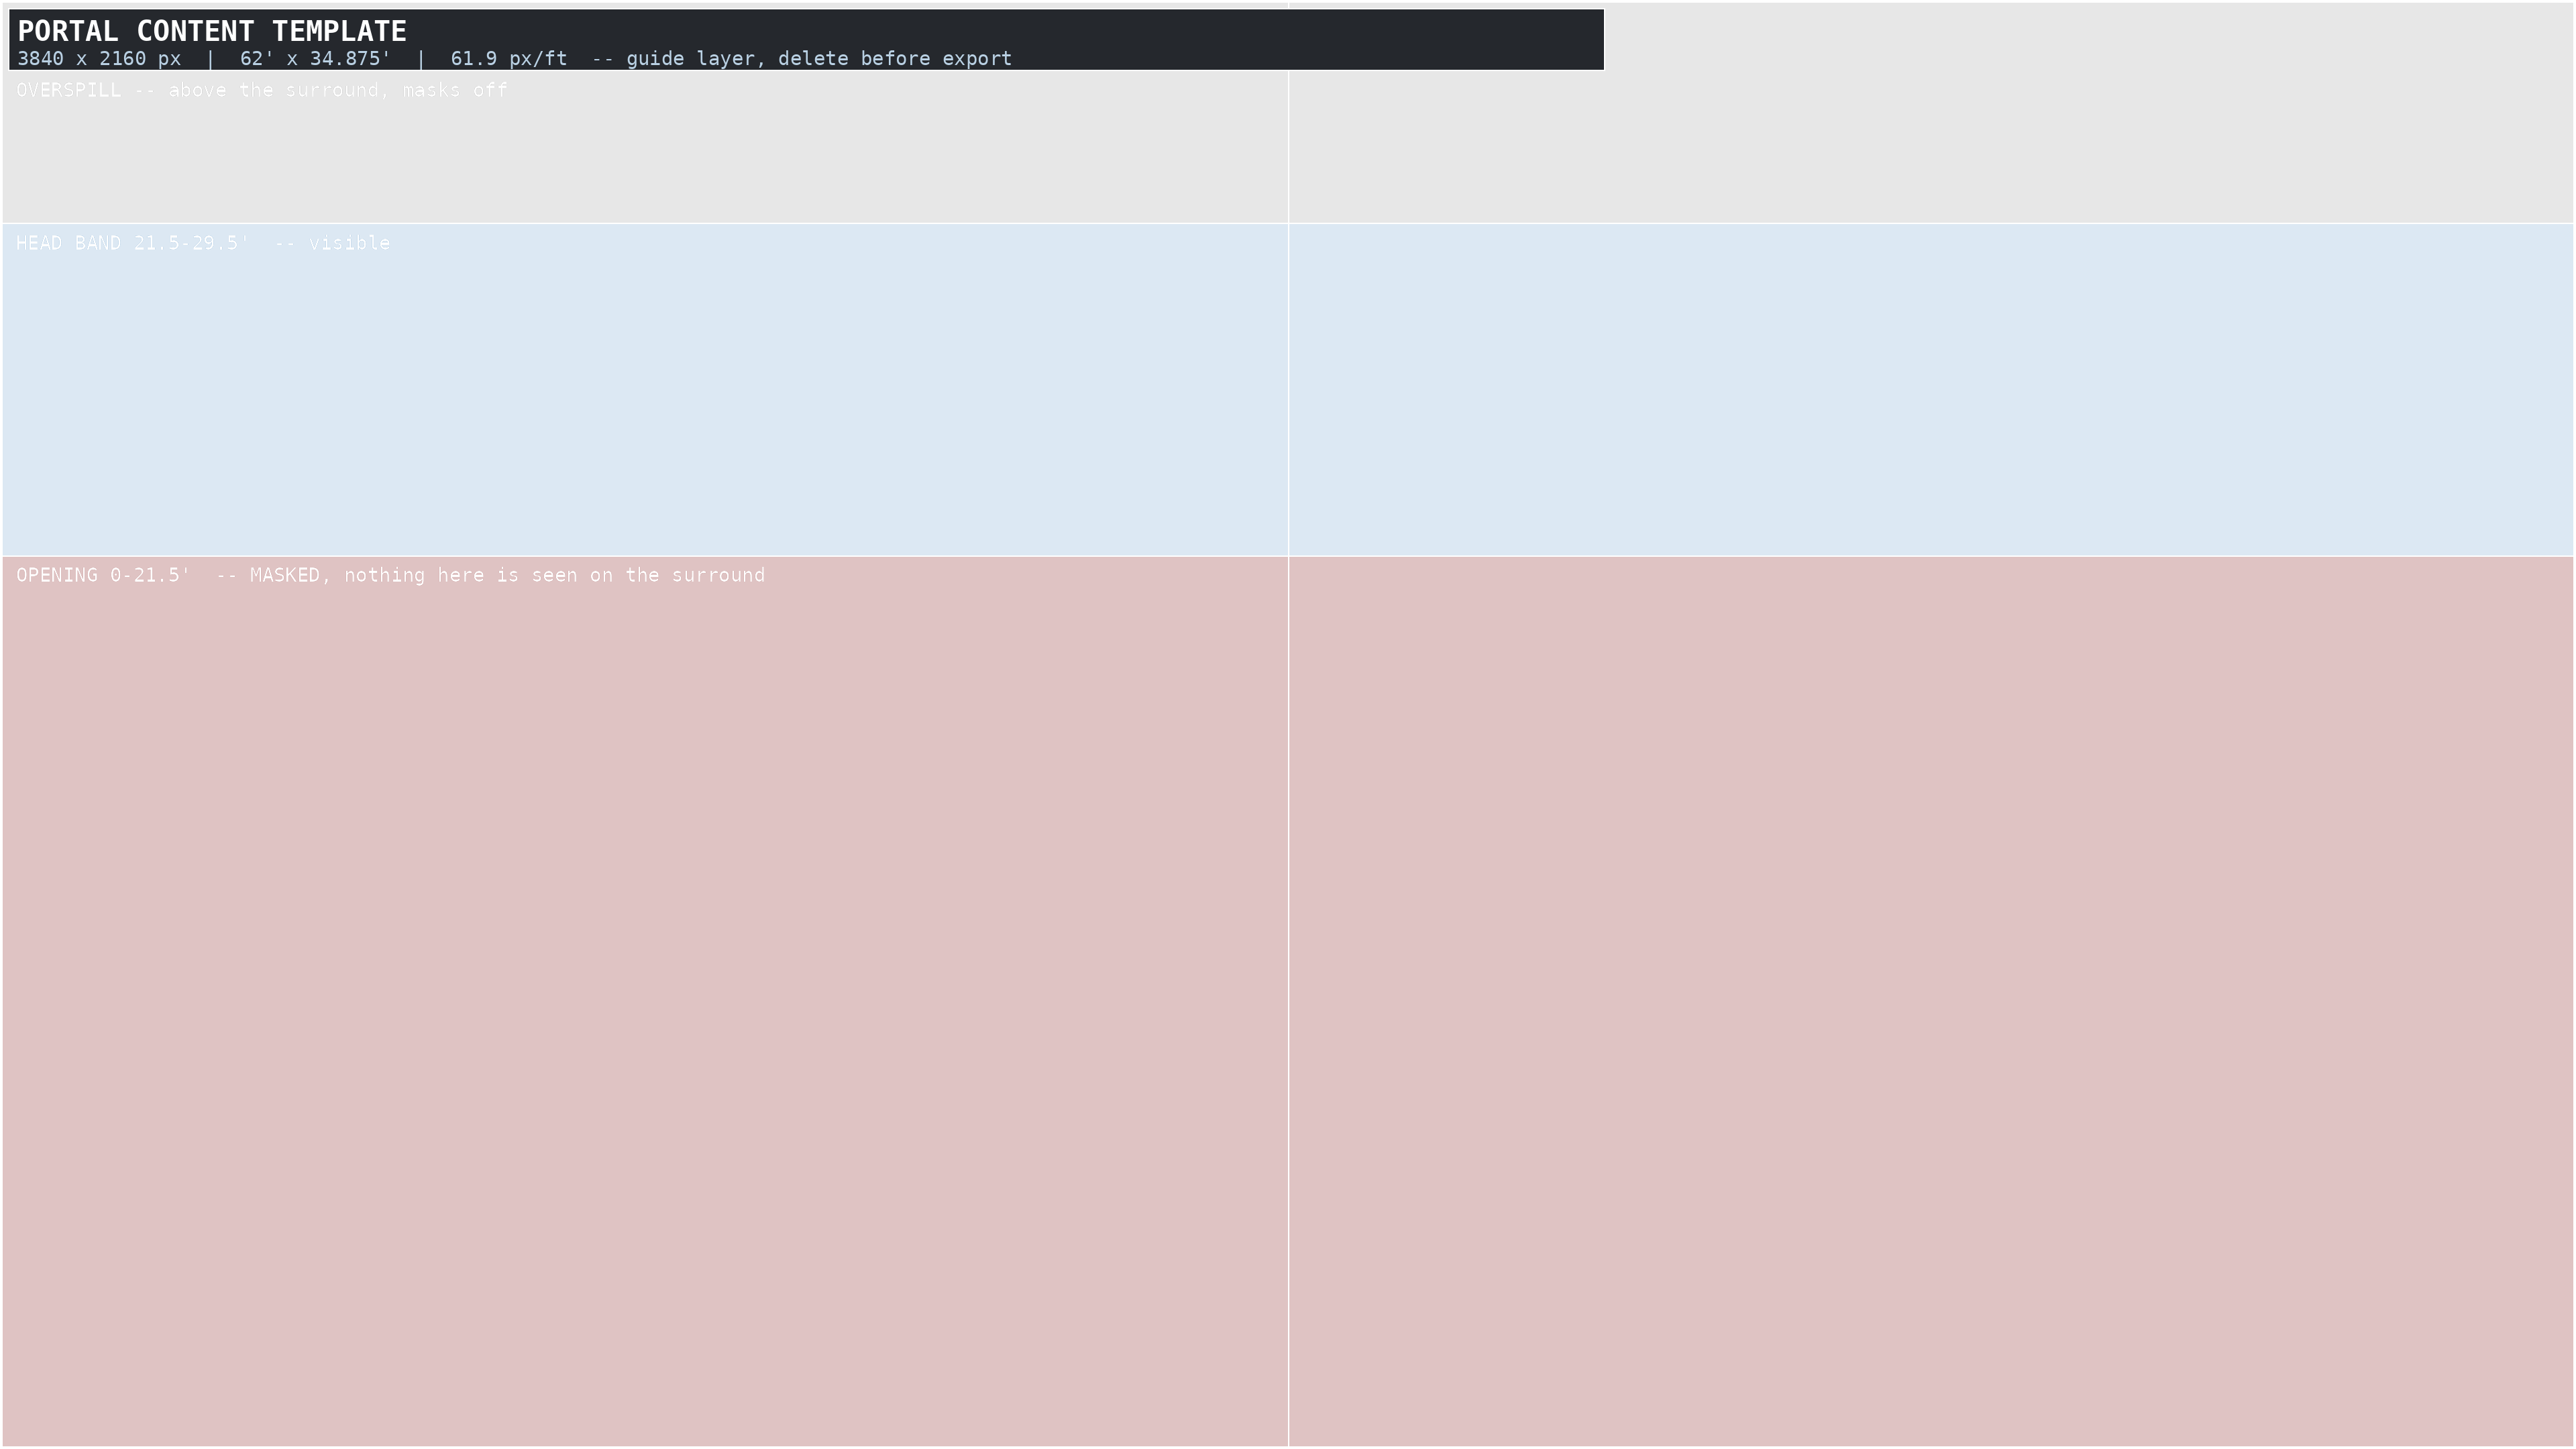
3840 × 2160
16 : 9
61.9 px/ft
Maps to 62.0′ × 34.88′. The frame band is the outer 6′ each side plus an 8′ header; everything inside the opening is masked.
LEG (each)
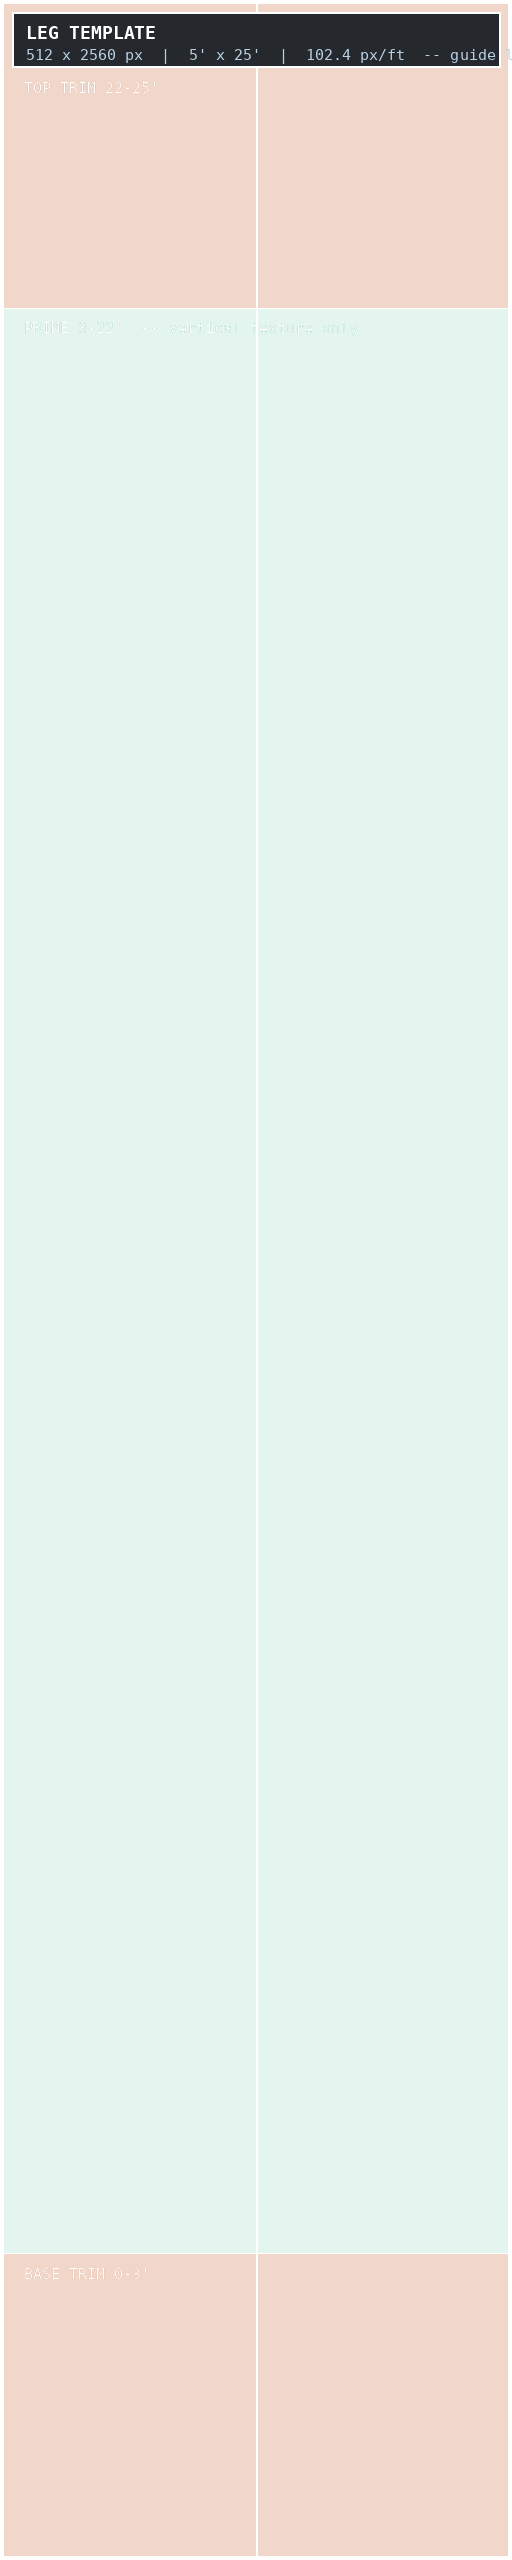
512 × 2560
1 : 5
102 px/ft
Extreme portrait. Design vertically from the start.
Encoding
HAP or HAP Q in a .mov, not H.264. HAP decodes on the GPU and loops without
hitching; H.264 at these pixel counts drops frames the moment three surfaces play at once.
Every background must loop seamlessly. Almost every cue is an ambient hold
of unknown length — the ice palace stays up as long as the scene runs.
Deliver a matching still frame for every moving cue. If playback fails
mid-show a still is a recoverable night; black is not.
Design rules for this rig
Nothing critical in the bottom 8′ of the cyc. That is the 3.0 fL zone and
the shadow-and-bounce band. The previz in Section 03 shows exactly what happens when you ignore
this.
Legs are texture, not picture. At 5′ wide a leg cannot carry a scene.
Bark, ice crystal, aurora light, frost creep. Vertical motion only — horizontal motion on a
1:5 canvas reads as an error.
Grade the upstage legs about a quarter stop hotter than the downstage pair, or
accept that they sit back — 12.2 fL against 10.6. They are 6′ further from the lens. Make it a decision in the
edit rather than a surprise at tech.
Colour-match legs to cyc, not to the portal. The audience sees legs and cyc
in the same glance through the opening; the portal is a separate visual frame.
Grade on the actual surfaces at show brightness. Content that looks rich on
a laptop goes flat at 8 fL. You will push contrast and saturation well past what looks right on
a monitor.
11
Cue-by-cue surface plan
A starting allocation in running order. The recurring principle: the portal is the
emotional temperature of the show and changes rarely — roughly nine times across two
acts — while the cyc changes with every location and the legs change with the world state.
Act I
Number
CYC
LEGS
PORTAL
Vuelie / Prologue
Northern sky, slow aurora
Dark pine, faint frost
Nordic carved wood, cold
Let the Sun Shine On
Arendelle fjord, summer light
Green birch, sun-dapple
Warm painted wood
A Little Bit of You
Interior night, snow motes
Castle drapery, still
hold
Hidden Folk
Moss and stone, moving mist
Rock faces, moss glow
Stone / lichen
Do You Want to Build a Snowman?
Window light cycling seasons
Corridor, seasonal shift
hold, slow desaturate
For the First Time in Forever
Castle gates opening, bright
Banners, gold
Coronation gold + wood
Hans of the Southern Isles
Town square, bunting
Timber houses
hold
Queen Anointed
Chapel interior, candle warm
Stone pillars
hold
Dangerous to Dream
Interior, cold creeping in
Frost beginning at base
First frost across the frame
Love Is an Open Door
Warm interiors, playful
hold
hold
The freeze
Fjord ices over in real time
Frost climbs to full
Frame freezes solid
Reindeer(s) / What Do You Know About Love
Snow wilderness, drifting
Snow-laden pine
hold
In Summer
Fantasy warm-out, then snap back
Fantasy warm, then back
Brief warm gag, then back
Let It Go
Ice palace builds, crystal bloom
Ice trees crystallise upward
Full crystal ice frame
Act II
Number
CYC
LEGS
PORTAL
Hygge
Oaken's interior, sauna steam
Log walls, warm
Warm timber
I Can't Lose You
Ice palace interior, cold
Ice columns
Crystal ice
Snowman reprise
Open snowfield
Bare snow pine
hold
Fixer Upper
Hidden Folk glade, warm aurora
Moss, bioluminescence
Aurora violets
Kristoff Lullaby
Night sky, single aurora ribbon
Dim, static
hold
Monster
Ice palace fractures, storm builds
Cracking ice
Frame fractures
Colder by the Minute
Full whiteout blizzard
Whiteout
Whiteout across everything
The thaw
Ice releases, fjord returns
Frost retreats, green returns
Frame thaws to warm wood
Finale
Full summer Arendelle
Green birch, gold light
Full warm, festival
The three moments that carry the design
The freeze, Let It Go and Colder by the Minute
are the only three cues where all six surfaces move together as a single event. Build those first,
build them as one synchronised piece across STG_ALL, and give them the
most rehearsal. Everything else in the show is ambience.
12
Content sourcing and rights
Two viable paths, and the licensing question is not optional — Disney titles are actively
policed and your production licence does not cover projected imagery you source yourself.
Licensed package. Broadway Media sells authorised Scenic Projections for both
Frozen and Frozen JR through MTI, pre-cued to the script. It comes in two tiers
and the tier matters enormously here: the standard licence delivers playback through their own
StagePlayer app, while the professional licence is the one that gives you QLab files
and permits mapping and custom elements. For a six-surface mapped rig the standard tier is not
usable — buy professional or do not buy it.
Original content. Anything you originate still has to clear with MTI and Disney,
and the authors' Frozen licence has design restrictions attached. Ask your MTI rep in
writing before your designer starts work, not after.
Whichever path you take, expect to originate the leg content yourself. No stock
package ships 1:5 portrait loops cut for four independent panels, and it is the least
labour-intensive content in the show to make.
13
Order of process
The sequence matters more than the hours. Hanging before the survey, focusing before the
scenery is trimmed, or warping before the canvas is tensioned each cost a full day. Six phases,
each with a gate that has to close before the next one starts.
Phase 1 — Survey and design lockWeeks out: 10–12
Confirm the surveyed numbers on the deck rather than off the plan. Re-run the generator and read
the clearance checks. Confirm line set 14 is free for the Epson and set 12 for the upstage legs.
Order the DP 109-236 lens. Settle the licensing path with MTI in writing.
Gate: the survey numbers are in the generator and both clearance checks pass.
Phase 2 — Scenic buildWeeks out: 6–10
Build the three portal units and four leg frames. Skim, sand, prime. Paint sample boards first
and approve them under the real projectors. FR-treat and file the certificate. Order the cyc
early — seamless goods have lead times.
Gate: paint approved on a hung sample under a projector, not on a bench.
Phase 3 — Content buildWeeks out: 4–8, parallel with Phase 2
Designer works to the canvases in Section 10 with the guide overlays from the asset pack. Build
the three big synchronised moments first. Every cue loops; every cue ships a still.
Gate: the freeze, Let It Go and Colder by the Minute play end to end.
Phase 4 — Hang and cableLoad-in day 1
Projectors in position, every signal path proven end to end with a test pattern. Soft goods and
panels hung, trimmed, tensioned and locked at show positions.
Gate: nothing moves again. This is the hard gate — every warp downstream
assumes it.
Phase 5 — AlignLoad-in day 2
Optical first, then warp, then converge, then mask. Photograph everything. Section 14 is the
procedure.
Gate: all warps photographed and the workspace backed up in three places.
Phase 6 — TechTech week
Content pass in a dark house first, then negotiate with the light plot, then run it, then
re-check register. Expect the lighting conversation to be real — any front light that
spills onto a projection surface flattens it, and the answer is almost always steeper angles and
more side light, which suits this show anyway.
Gate: the pre-opening checklist in Section 15 is complete.
14
Alignment procedure
Run this once, properly, on load-in day 2. Everything projects from the asset pack —
grids, placement guide and grey fields are in assets/templates-pack/grids/.
Patch the devicesConfirm all four outputs appear in Workspace Settings →
Video. Set each projector to native resolution. Disable every projector-side keystone,
digital zoom and auto-geometry function, and turn off eco and dynamic-contrast modes
— dynamic contrast will make the stacked TITANs pump against each other.
Create output routesOne per projector at native resolution. Name by position,
not serial: P1-CYC, P2-FOH-A.
Create the stagesSizes per Section 09. Stage aspect matches the physical
surface so content lands undistorted before anything is warped.
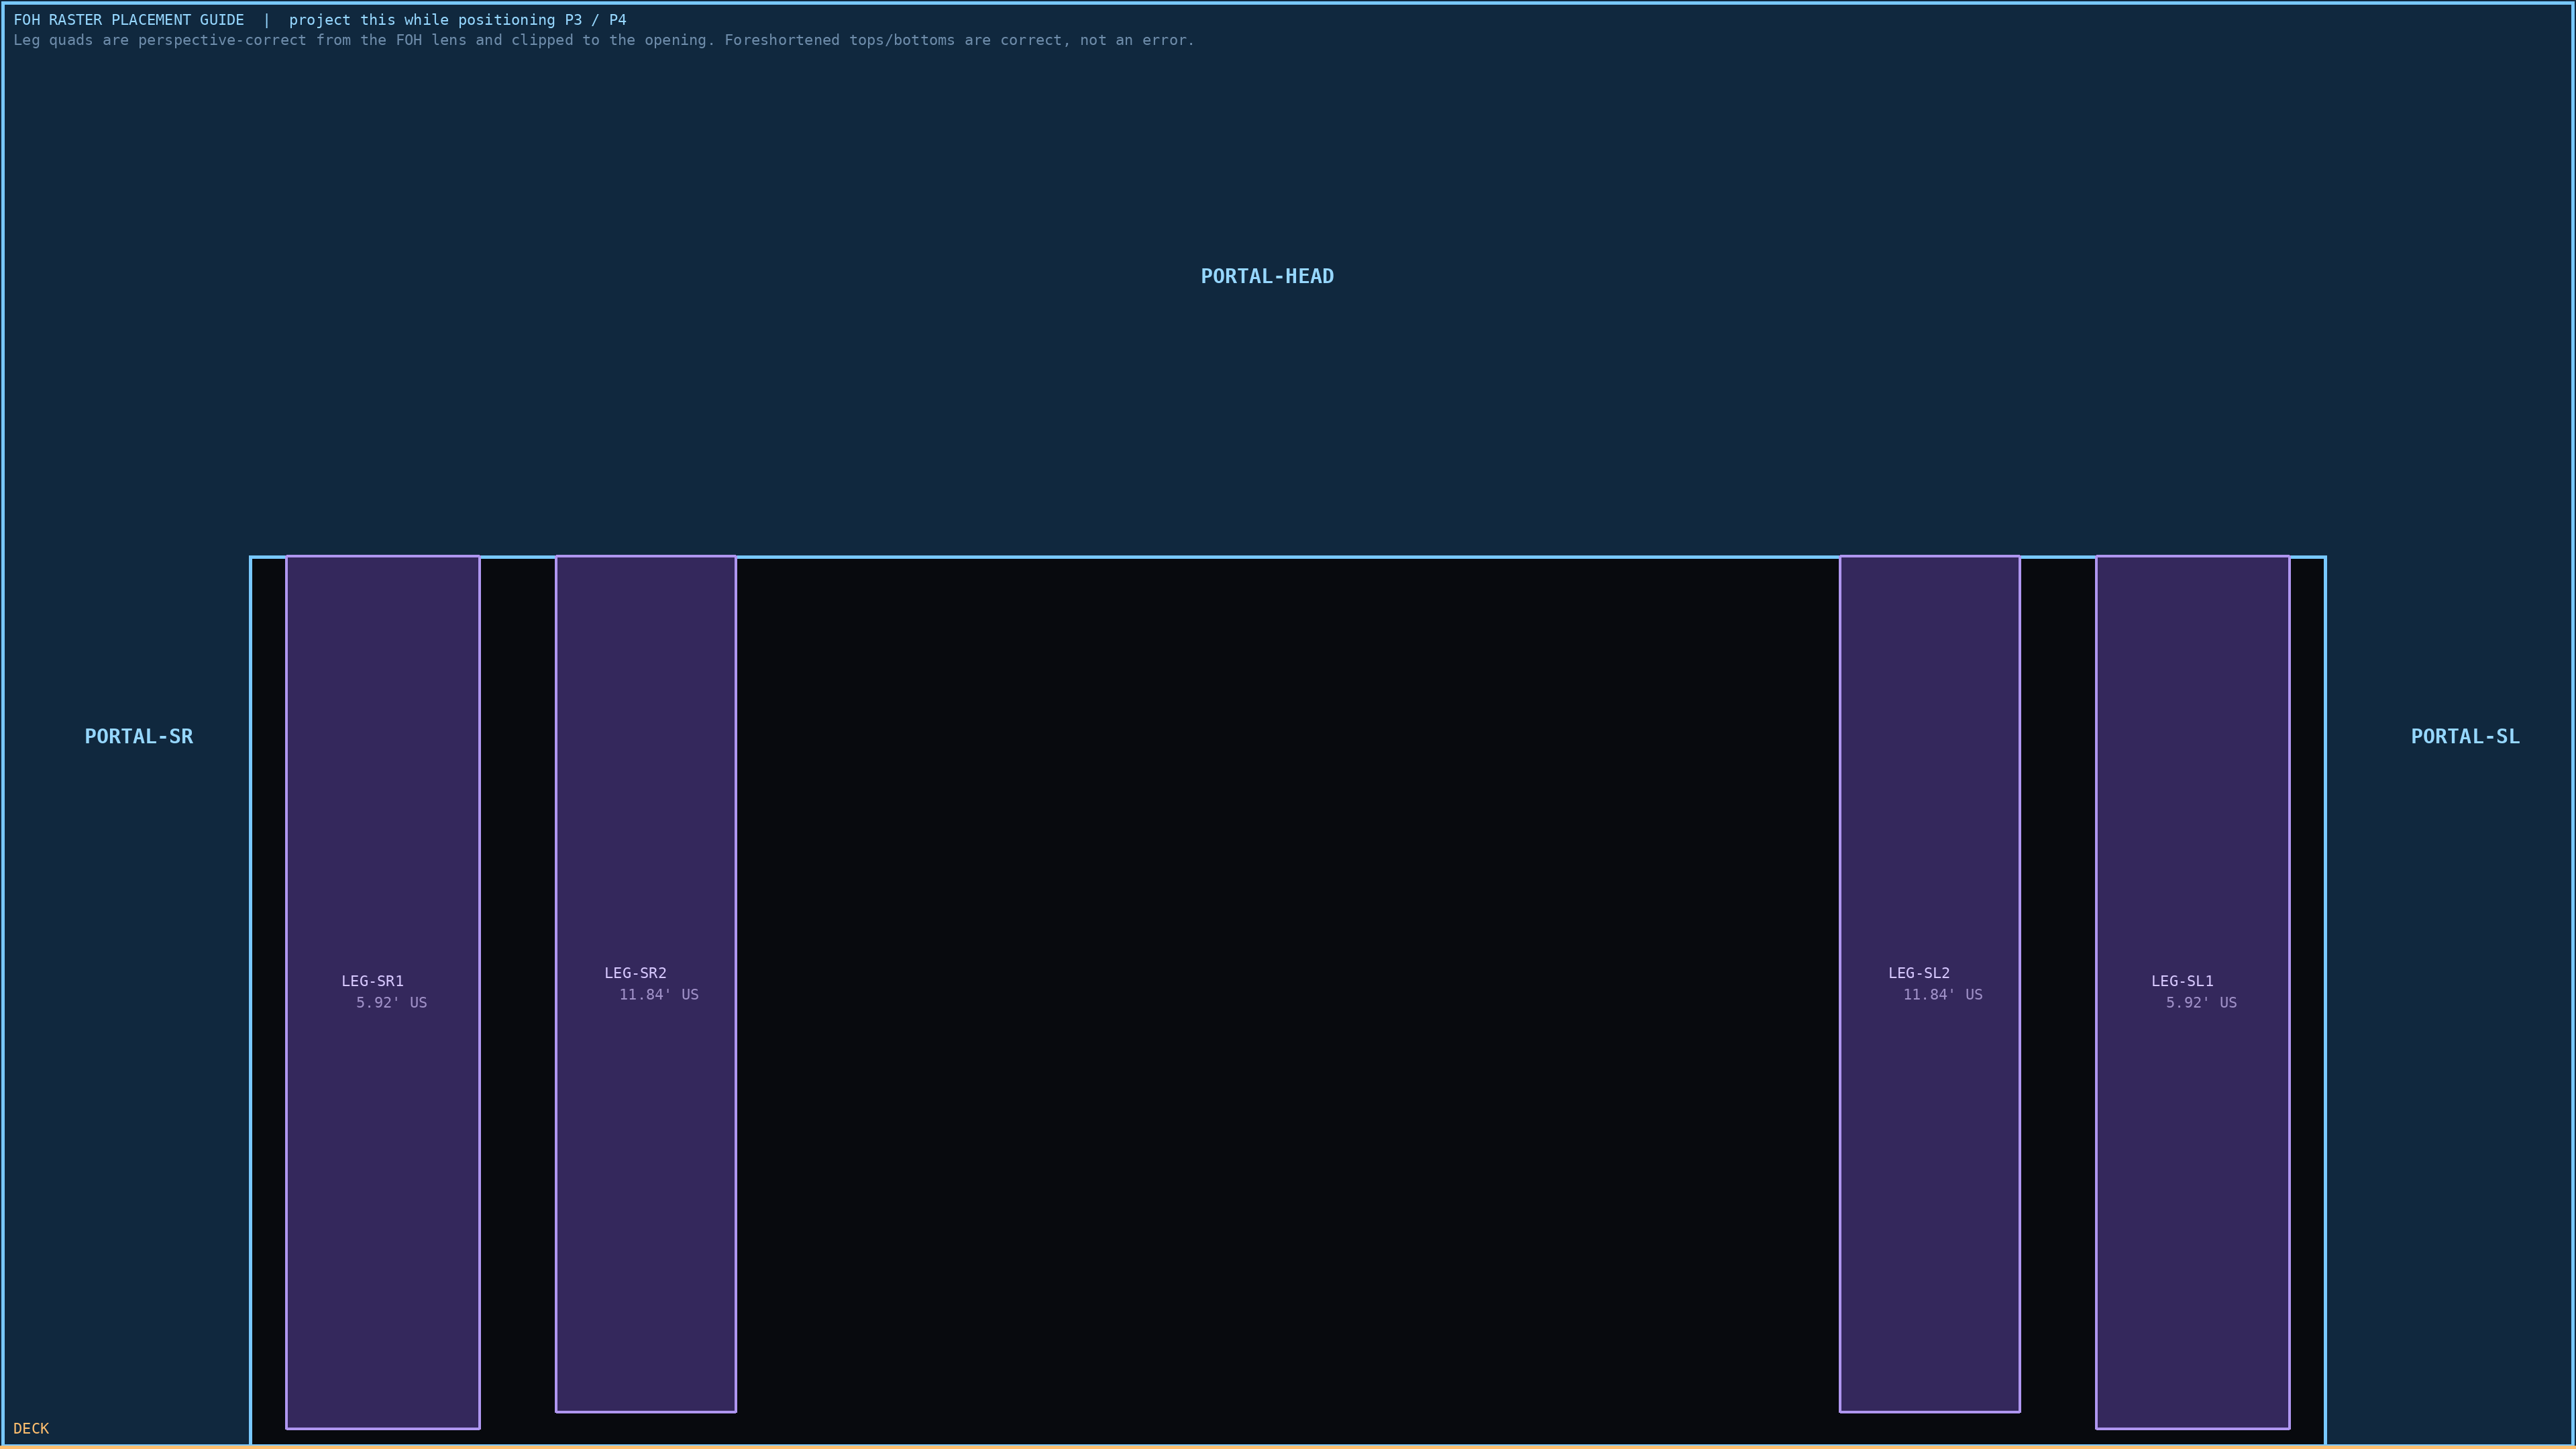
Project the placement guideSend
foh-placement-guide-3840x1920.png to the TITAN stack while you are still
positioning and lensing. Move the units until the real surround and legs land near their targets
optically.
Rough in with lens shift, not warpEvery degree fixed optically is pixels and
brightness you keep. Warping is for the last 5%.
FocusFocus the FOH stack on the portal frame using the grid's corner targets.
Walk on stage and check a leg — both will be sharp. On the Epson, focus the middle
slant distance to the cyc rather than the centre of the image.
Warp each regionGrid overlay on. Perspective warp for the
flat portal and legs; Bézier with a 4×4 or 8×8 control
grid for the cyc, which is never as flat as it looks. Type the leg corners from Section 09
straight in.
Converge the stackAlignment grid on one TITAN at a time, then both. Every
line must sit exactly on its twin — a stack one pixel out reads as soft and people blame
the focus. Then 50% grey and check both units for colour match; correct at the projector,
not in QLab.
Load masksPortal frame, cyc trim, per-leg visibility. Iterate live —
QLab reloads a stage mask when the file changes on disk.
Meter the cycFive heights across the lit area, top to bottom. Compare against the profile in
Section 08 and choose a gradient mask, or none.
Lock and photographPhotograph every warp screen and every region's numbers.
If a projector gets bumped at 11pm on a Tuesday, this is what gets you back.
15
Checklists
Print these. The whole section is laid out to print cleanly on four pages.
Scenic build
Portal built as three units — header plus two side bands, not one 60×30 piece
Flat joints skimmed, sanded and invisible under raking light
All four leg frames rigid; no rack when pushed at the top
Paint is flat, neutral white, zero sheen — approved on a hung sample under a projector
Offstage edge of every leg carries a 2–3″ black border
Cyc is IFR, seamless or welded, and unpainted
FR certificates on file for every soft good and painted surface
Top hanging hardware and bottom restraint hardware fitted to all four legs
Hang and cable
Epson on line set 14, inverted, 24.92′ trim, minimum vertical shift
Three-foot clearance from the Epson to LEG-*2 confirmed with a tape, not by eye
Black border hung downstage of the Epson — check the balcony sightline specifically
Two TITANs rigged in the tech booth on one raster, both with the 109-236 lens and fresh lamps
Power: ~5 kW available at the tech booth; measured, not assumed
Every signal path proven end to end with a test pattern before anything else
Cyc trimmed, tensioned, bottom-piped and tied at both corners
All four legs flown, plumbed, and positively tied at the bottom
Portal units assembled, plumb, and locked to each other
Spare HDBaseT or fiber run tested and coiled at each position
Alignment
TITAN vertical shift range confirmed to reach 31% before anything is hung
All projector-side keystone, auto-geometry, eco and dynamic contrast confirmed OFF
Circle on the alignment grid reads as a true circle on every surface
Six regions warped; leg corners match the table in Section 09
TITAN convergence checked on the grid, not on content
TITAN colour match checked on 50% grey at show brightness
Cyc metered at five heights; gradient mask chosen and loaded
Portal frame mask and cyc trim mask loaded
Every warp screen photographed
Workspace backed up to two drives plus one off-site
Content delivery
Every file HAP or HAP Q in a .mov, at the exact canvas size for its surface
Every background loops seamlessly — checked by playing it three times through
A still frame exists for every moving cue
Nothing critical in the bottom 8′ of any cyc cue
Upstage leg content graded half a stop hotter than downstage, or the decision made not to
Legs carry vertical motion only
Every cue graded on the actual surfaces at show brightness, in a dark house
Mask .psd files archived alongside the exported .png
Pre-opening
Register re-checked after the first full run — something will have moved
Blackout cue proven to take all six surfaces to true black in one go
TITAN dousers tested if the software black floor is visible
Lamp hours logged for all eight TITAN lamps
A written re-warp procedure a non-designer could follow on a dark night
Still-frame fallback cues tested by actually firing them
Show operator has walked the recovery procedure below once, live
Show day, and when it goes wrong
Power on 20 minutes before house — metal halide needs warm-up, the laser does not
Run the alignment grid on all four units at half hour; look for anything bumped overnight
Play one saturated cue and one whiteout cue before house opens
Confirm the blackout is black
If a TITAN fails mid-show: the other carries the portal and legs at half level.
It will look dim but it will read. Do nothing during the act; relamp at interval.
If the Epson fails mid-show: the cyc goes dark and there is no substitute in the
kit. Go to the still-frame fallback for the current cue and run the act on portal and legs alone;
the design survives it because the surround carries the emotional key.
If playback fails: stills first, then restart QLab from the backup workspace.
Never re-warp during a show.
16
Asset index
Everything below is generated from one set of venue numbers by
generate.py. Edit the VENUE dictionary with your
surveyed measurements and re-run — every grid, mask, template and clearance check rebuilds
against the real room, and the script prints the leg warp corners to type into QLab.
Where everything lives
This document is the index. The files sit beside it in
assets/templates-pack/ (grids, masks, content templates, the generator) and
assets/previz/ (the five composites and the renderer). Open
index.html from the unzipped folder and every link below downloads.
Alignment — project these, never play them in the show
File
Use
foh-placement-guide
Project while positioning and lensing the TITAN stack, before any warping. Shows where the frame band and all four legs fall in the raster.